recipes

Pomegranate Chai Fix

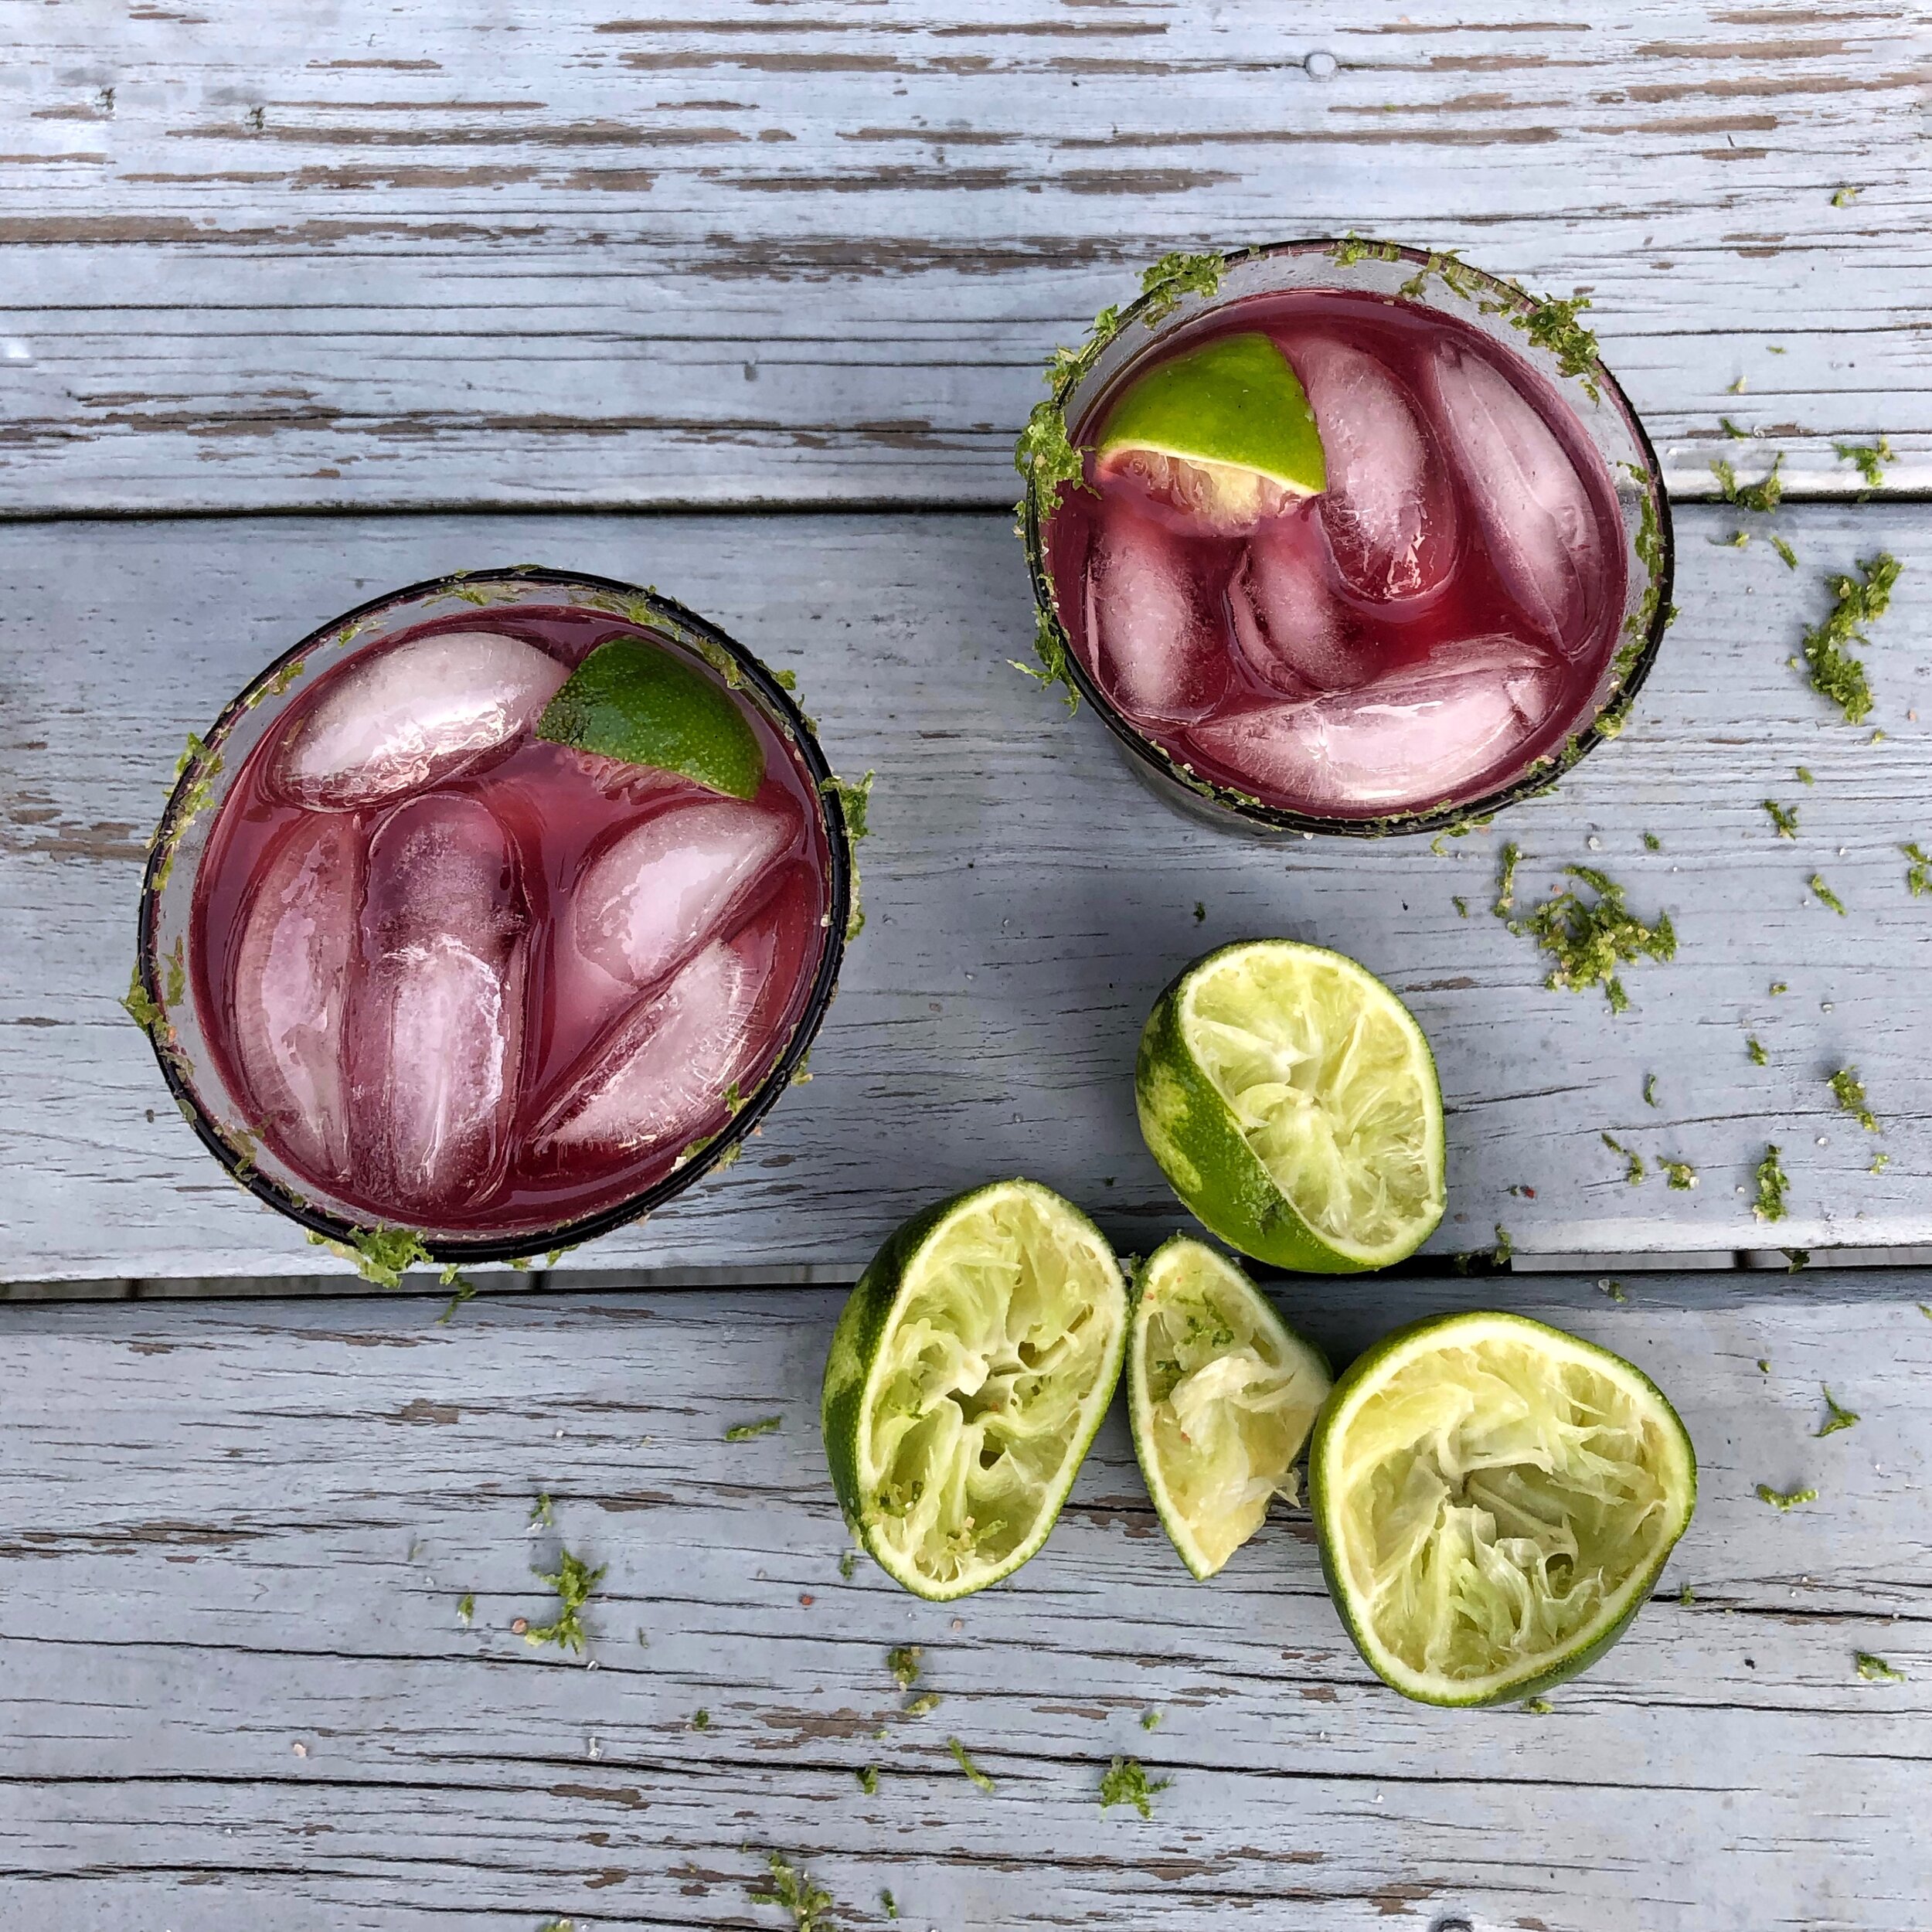
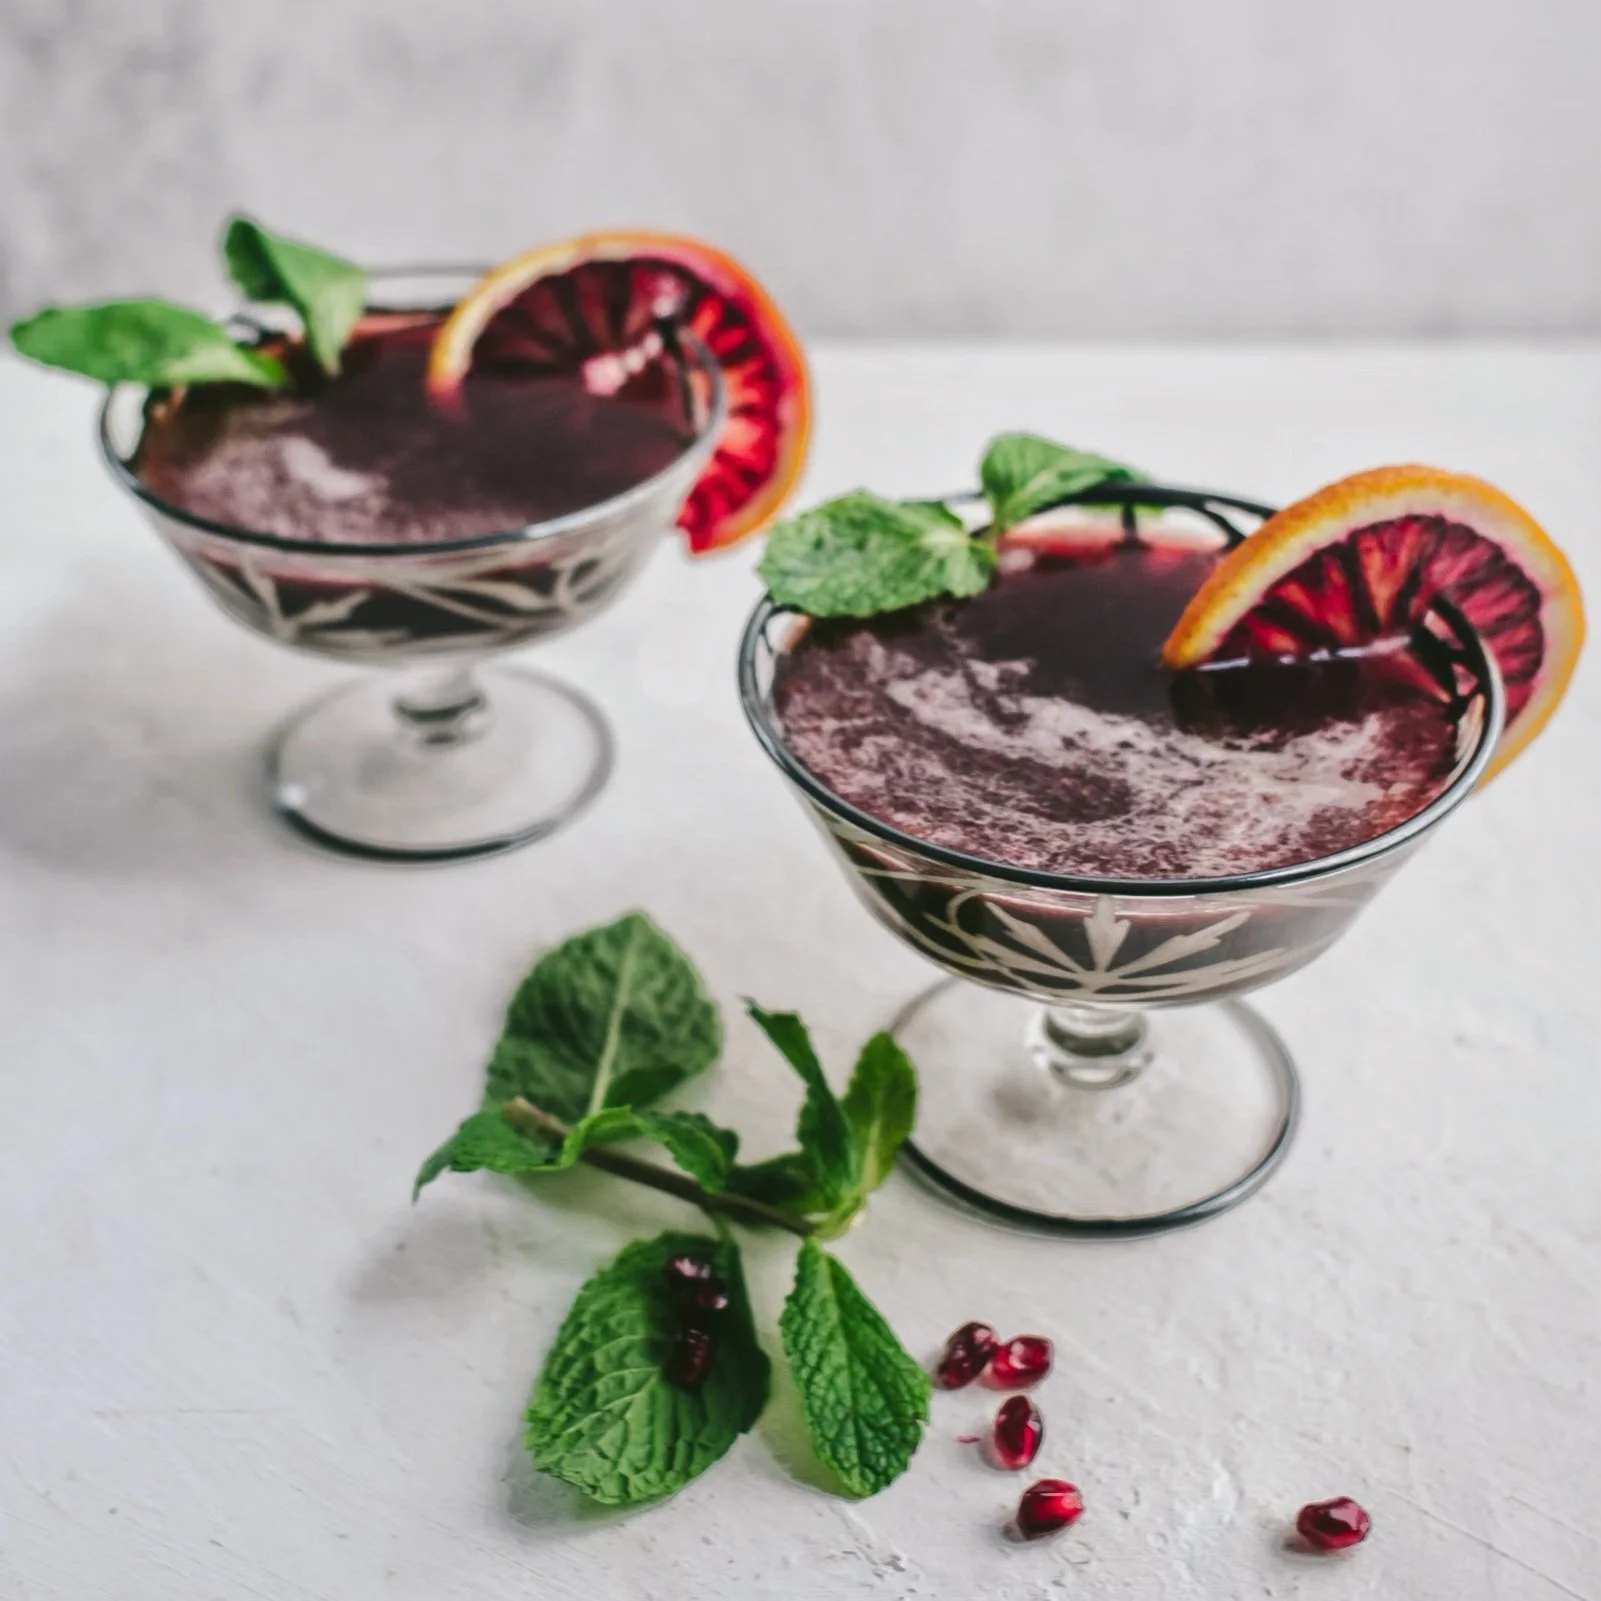
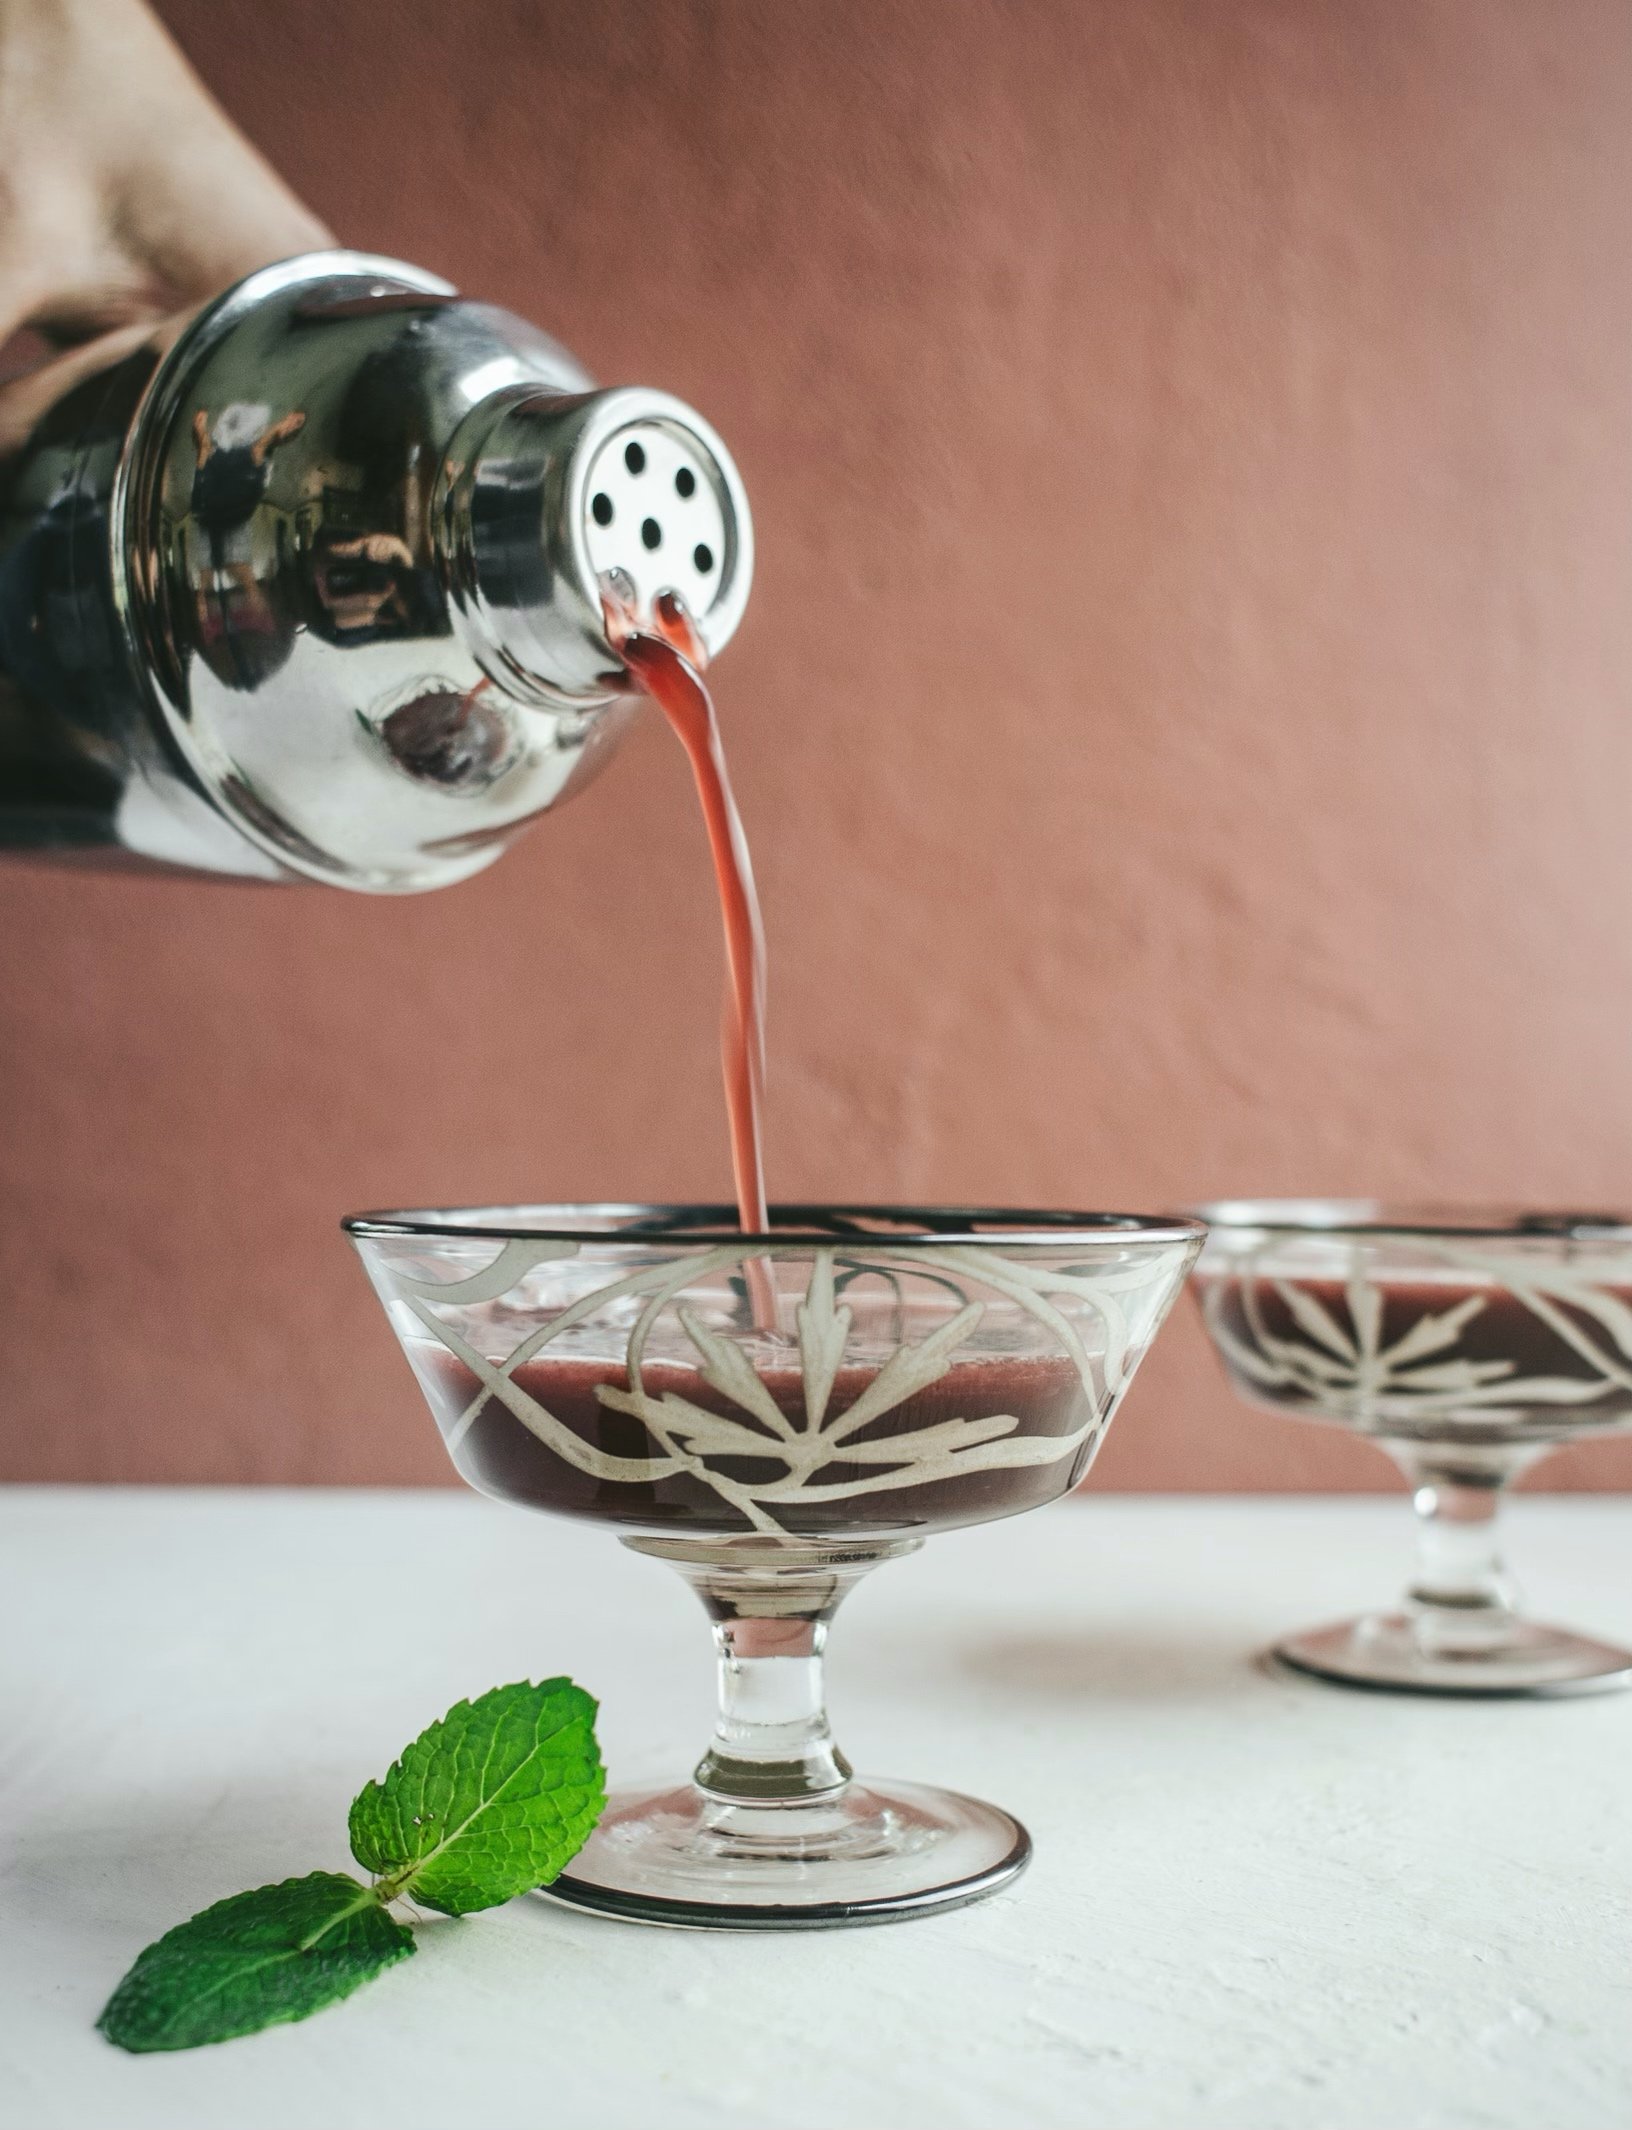
I love the spices in Chai Masala, and I’ll find a way to include them in as many things as possible, cocktails included. Clove, star anise, cinnamon, pepper, and cardamom compliment pomegranate beautifully. This cocktail has a great balance of sweetness, acidity and spice. Great on its own at a cocktail party or as a pre-dinner drink.

Note: You likely won’t use all of the syrup in 2 cocktails. You can make the syrup in advance, in an even larger batch if desired, and keep for mixing a single cocktail or two every once in a while. It stores well in a glass jar in your fridge for up to 2 weeks. Also, feel free to omit a spice or two if you don’t have it or don’t like it. You will still get a great flavor from the blend you use.


What You Need:

For the syrup:

½ cup water

½ cup granulated sugar

1 cinnamon stick

3 whole star anise

5-6 whole cardamom pods

2-3 black peppercorns

½ teaspoon whole cloves

1 cup blackberries, fresh or frozen

For two cocktails:

4 fluid ounces (½ cup) gin (or vodka if preferred)

2 fluid ounces (¼ cup) pomegranate juice

2 fluid ounces (¼ cup) fresh lemon juice

1 fluid ounce (2 tablespoons) blackberry chai syrup

2 pieces of lemon peel


What You Do:

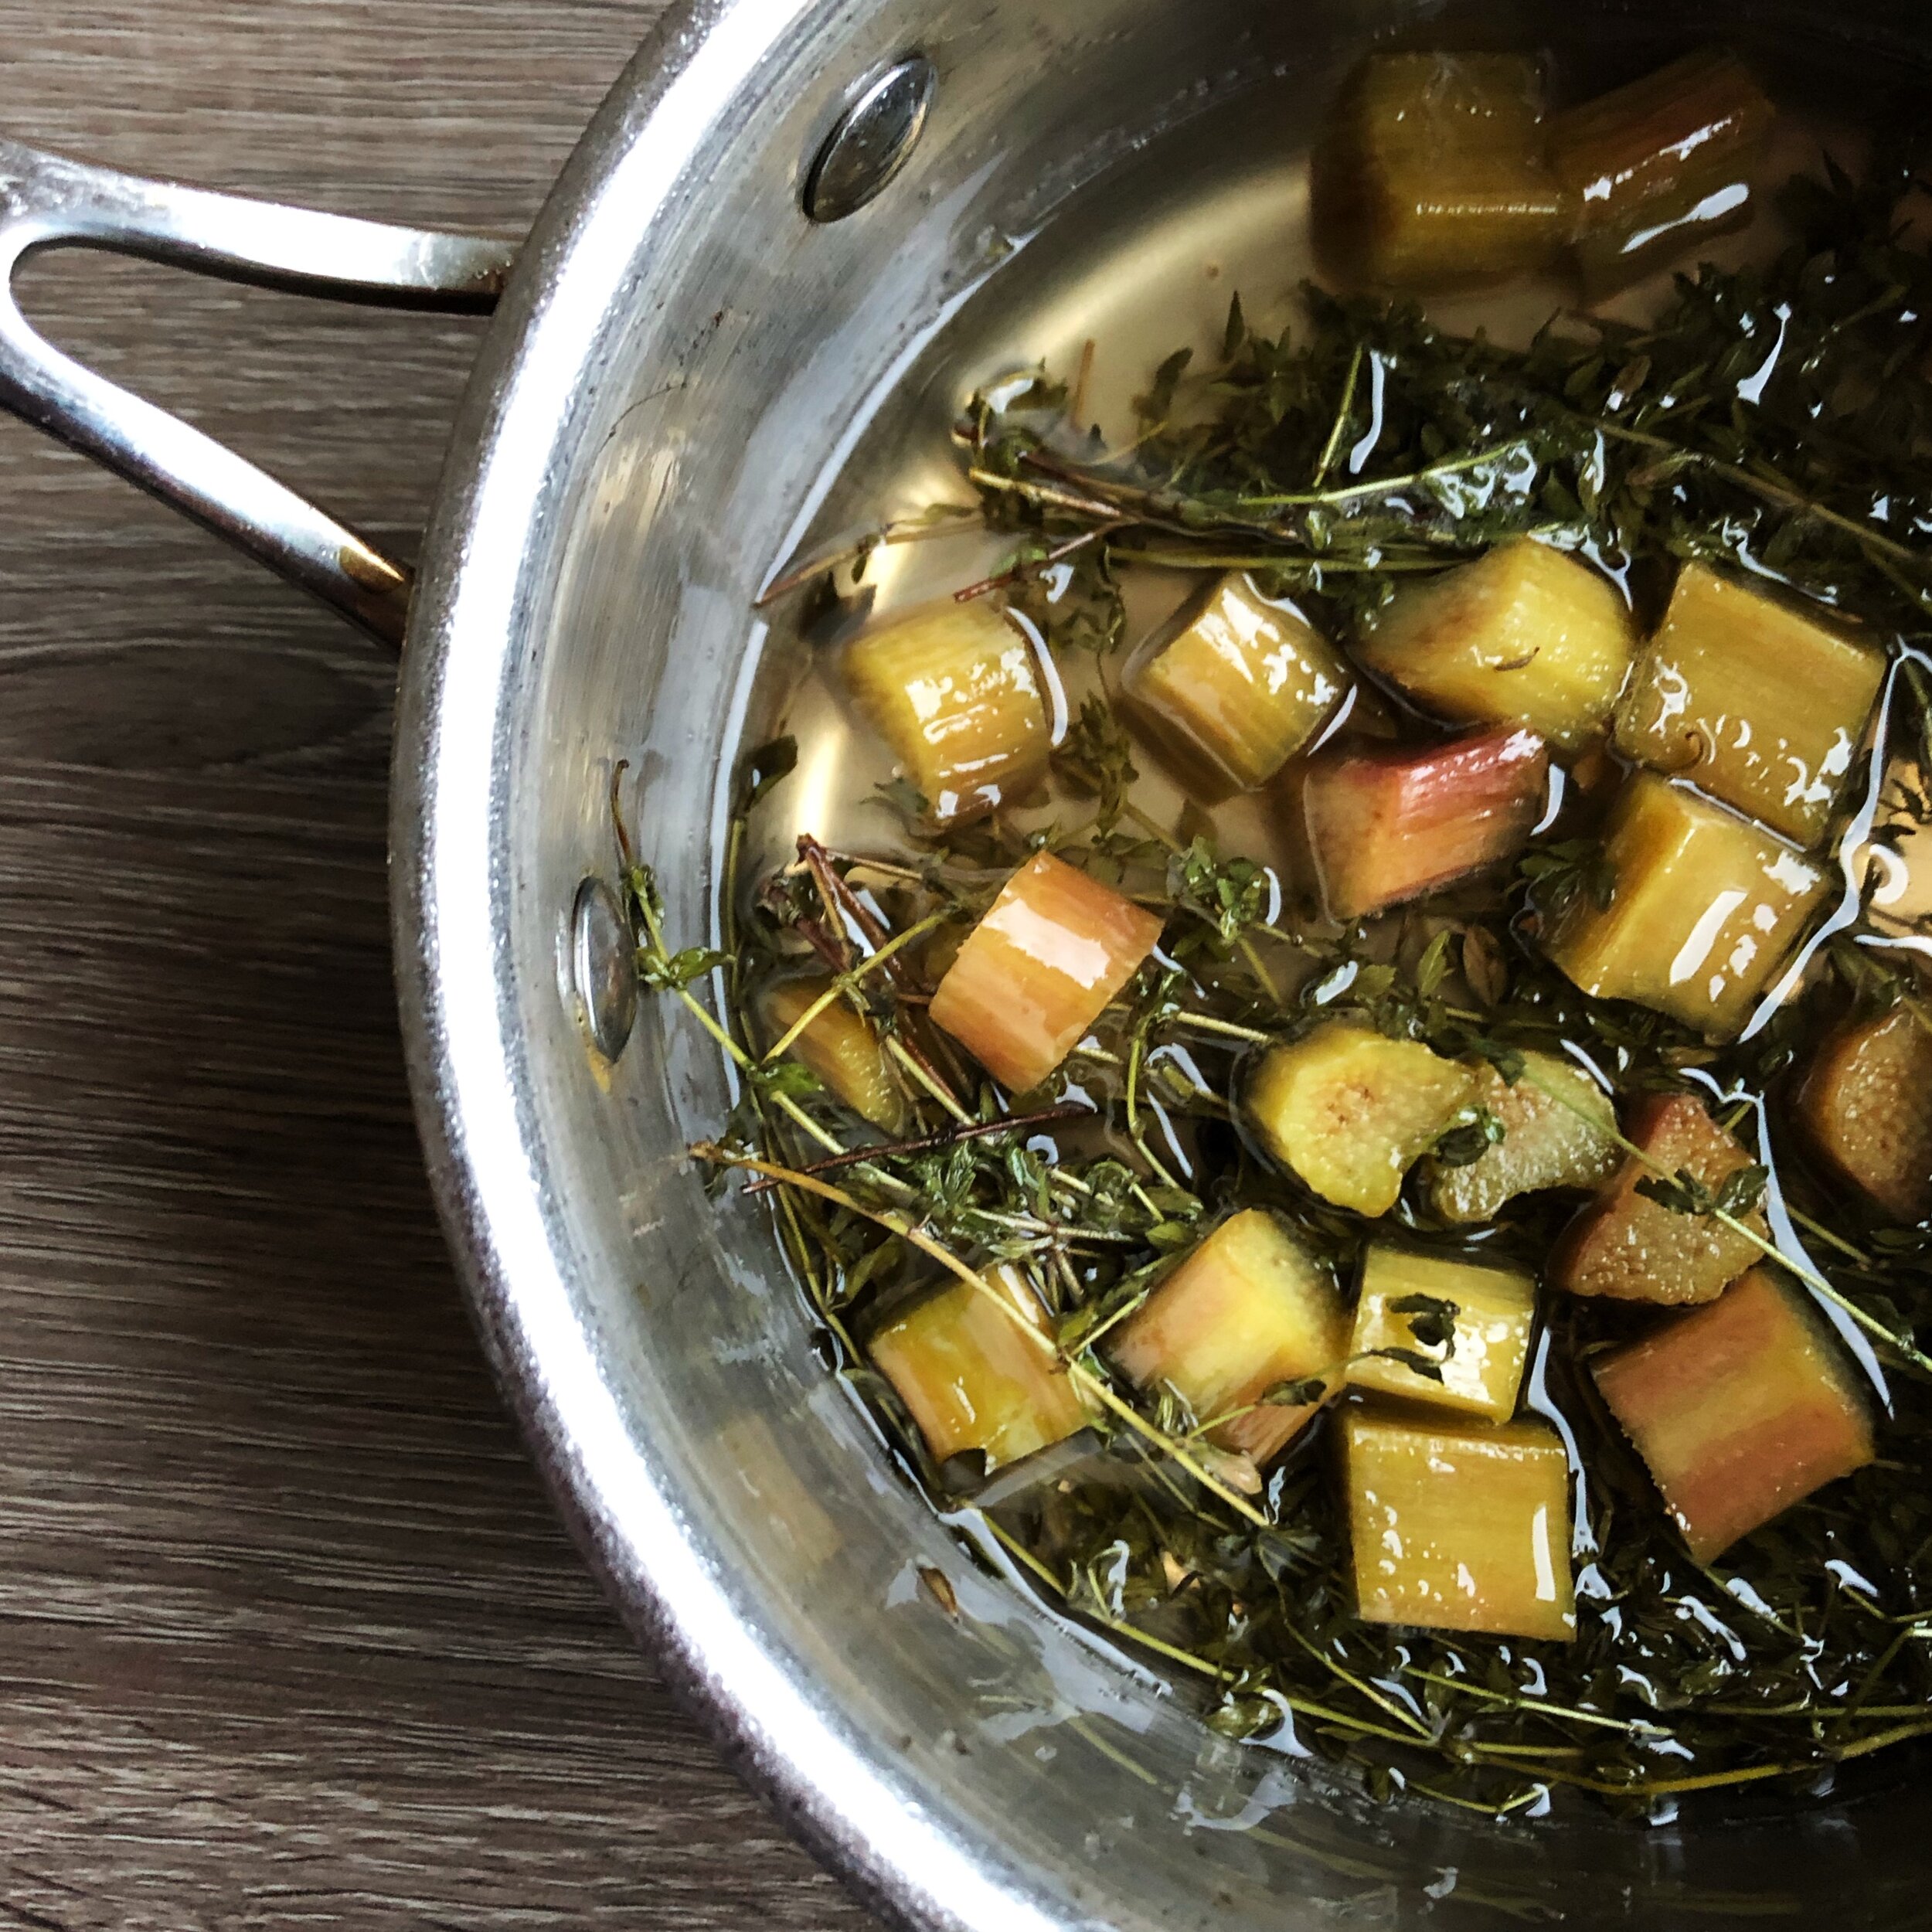
  1. Make the syrup: In a small saucepan, combine the water, sugar and spices. Stir together over medium heat until sugar dissolves. Add the blackberries and heat until they burst, adding water if necessary. Turn off the heat and allow it to steep for 10-20 minutes. Strain, reserving the spices for garnish.

  2. Make the fix: In a shaker, combine gin, pomegranate juice, lemon juice and about 2 tablespoons of the strained syrup with a few cubes of ice. Lock the lid and shake vigorously for 2-3 minutes or until the shaker is chilled with lots of condensation on the outside. The mixture should be frothy.

  3. Taste and adjust if needed.

  4. Fill 2 rocks glasses with ice. Pour the mixture over the ice. Garnish with a couple of the reserved whole spices and a twist of lemon.

Pumpkin Wontons with Sichuan Chili Oil

Pumpkin Wontons with Sichuan Chili Oil

Pumpkin is not just for dessert! it is a vegetable, from the squash family, after all. You can use pumpkin to make all kinds of savory dishes. Start with this Pumpkin Wonton in Sichuan Chili Oil because it is easy and you will love it. In fact, I can’t get enough of these.

Shaved Asparagus and Rhubarb with Farro and Sherry Vinaigrette

Dusting ourselves off like the root cellar vegetables we've become, New Yorkers visit our spring farm stands and green markets with hopeful bated breath. New arrivals emerge one at a time, announcing their presence like runway models showcasing a spring collection at New York fashion week. [I’ve never once been to NY fashion week but I imagine it to be like this. And, I most certainly would attend a fashion week parading spring produce.]

The most magical moment of all in this spring awakening is the overlap of rhubarb and asparagus. As if testing the very functionality itself of the Italian adage what grows together goes together, these two spring stars beg to be combined in dishes, sometimes with greens, herbs or spring onions, sometimes not.

Below is a recipe that allows both of these to shine, with the rhubarb and asparagus prepared raw, so you can truly appreciate them. They are sliced super thin (without a mandoline, a vegetable peeler does the trick), seasoned with salt and tossed in a light sherry vinaigrette to tenderize them. Complete the salad with farro and goat cheese, and you have spring produce week's most sought after lust-have.

Shaved Rhubarb and Asparagus with Farro and lemon sherry Vinaigrette

serves: 4

What You Need:

  • ½ cup farro, soaked for at least 1 hour or up to 6 hours

  • 1 tablespoon honey

  • 2 teaspoons dijon mustard

  • ¼ cup extra virgin olive oil

  • 1 tablespoon freshly squeezed lemon juice

  • 1 tablespoon freshly squeezed blood orange juice

  • 2 tablespoons sherry vinegar

  • Kosher salt

  • Freshly ground black pepper

  • 1 bunch asparagus, trimmed of woody ends

  • 2 large stalks rhubarb, sliced very thin

  • Creme fraiche or goat cheese, optional

What You Do:

  1. Fill a medium saucepan with water and bring to a boil. Add a palmful of salt. Drain the farro and rinse. Add the farro and cook until tender and just starting to split open, about 30-40 minutes.

  2. In a large mixing bowl, combine the honey and dijon mustard. While whisking constantly, drizzle in the olive oil and whisk until smooth. Whisk in the lemon juice, orange juice and sherry vinegar. Season with salt and pepper to taste.

  3. Lay an asparagus spear down flat on your cutting board and with a vegetable peeler, peel the asparagus into long thin ribbons. Repeat with the remaining asparagus. 

  4. Season the asparagus and rhubarb with salt and toss with the vinaigrette. Allow to sit for at least 30 minutes. 

  5. Drain the cooked farro and arrange in a bowl or on a platter. Pour the excess vinaigrette from the vegetables over the cooked farro and then top with the ribbons of asparagus and thinly sliced rhubarb. Serve with a dollop of creme fraiche or goat cheese if desired.

Basil Poppy Seed Yogurt Dressing

Basil Poppy Seed Yogurt Dressing

This Basil Poppy Seed Yogurt Dressing comes together in a flash. Puree everything together in a blender until smooth. Yogurt, lemon juice and olive oil give it a tangy and creamy, yet not heavy base. It's flavored with basil and crunchy with poppy. It works on everything from tomato sandwiches to grilled bok choy and stone fruit salads.

Extra Garlicky Shrimp Scampi

You become an adult when you have 3 or 4 recipes you consistently make, each time, calling up a parent to “remind you” how to make it. This Extra Garlicky Shrimp Scampi was one of the first recipes I took on in my adult life. Possibly, because my first time out on my own, without a meal plan, was in New Orleans, where the local catch was Gulf Shrimp. But even more so, because this meal is a breeze to throw together, doesn’t require special kitchen equipment or tools and only calls for a handful of ingredients you can schlep home without a shopping bag. As simple as it was, the first dozen or so times I made Shrimp Scampi, in my 20s, I would call up my dad and have him walk me through it. “How much garlic again?” “When do you add the wine?” “What kind of wine?” As a red wine drinker, he had strong opinions about this: “It doesn’t matter. I don’t drink white wine. It’s just for cooking. Use whatever you have.” For him, that was the remains of a bottle someone left behind in his fridge at the last card game or dinner party he hosted. Works for me.

This is my dad, holding a mail box he made out of wine corks, from bottles he likely enjoyed.

If adulting is calling up your parents to reteach you how to make a recipe, well then middle age is making that recipe repeatedly, in your own way that you’ve come to adapt over the years. I’ve since added the parsley stems to my version of Shrimp Scampi, as a way to infuse more of that herbaceous flavor, and to make use of the whole bunch. I also added shallots. Occasionally, I mix in chopped spinach or kale, to ensure we’re getting a rounded meal. And I wait to add the butter so that it doesn’t risk burning and maximizes its flavor. But when I make Extra Garlicky Shrimp Scampi, I still think of my dad and usually call him to let him know what a delicious dinner I’m having that night, with a crisp glass of Sancerre or Vermentino.

Extra Garlicky Shrimp Scampi

Serves: 4-6

On my list of Culinary Quickie recipes, this meal can be pulled together rapidly, perfect for a weeknight, but is also fancy enough for a dinner party. It’s fast and filling and the recipe is written in such as way as to help you maximize your time in the kitchen.

What You Need:

  • 1 pound linguine

  • Kosher salt

  • 1 bunch parsley

  • 1 bunch scallions

  • 2-3 tablespoons olive oil

  • 2 shallots, sliced, optional

  • 5-6 tablespoons unsalted butter

  • 1 head of garlic, about 10-12 cloves, peeled and minced 

  • Freshly ground black pepper

  • 1 pound jumbo shrimp, peeled & deveined

  • Juice from ½ a lemon

  • ½ cup dry white wine

What You Do:

  1. Bring a large pot of water to a boil. Add about 3 tablespoons of salt. Cook linguine until al dente (usually about 1-2 minutes less than package instructions call for). Reserve 1 cup cooking liquid, drain and set aside. 

  2. Meanwhile, separate the parsley stems from the leaves. Finely mince the stems and set aside. Finely chop the leaves. Set aside separately. 

  3. Trim the scallions of their root ends and frayed tops. Discard tops and ends. Finely slice or mince the white and light green parts. Set aside. Slice the green parts at an angle. Set aside separately.

  4. Heat a large sauté pan over medium high heat. Add olive oil. When hot, add shallots and white/light green scallions and a few pinches of salt. Reduce heat to medium. Sauté until soft,about 2-3 minutes. 

  5. Add the butter. When melted, add the garlic, minced parsley stems and a pinch of salt and freshly ground pepper. Sauté for about 1-2 minutes. 

  6. Add the shrimp, a lot more freshly cracked pepper and sauté about 3-5 minutes, or until the shrimp are pink and cooked through. (It will depend on the size of the shrimp and their temperature when being cooked.) Transfer the shrimp to a plate or bowl and set aside. 

  7. Add the lemon juice and wine, if using. Stir to scrape up any brown bits off the bottom of the pan. Add the cooked linguine and about ½ cup of the pasta cooking liquid. Gradually add more pasta cooking liquid if needed and cook until sauce is thickened. Return the shrimp to the pan. Toss to combine. Turn off the heat. Stir in the parsley leaves. 

  8. Transfer to a platter and garnish with more parsley leaves, green scallion tops, and freshly cracked black pepper. 

Banana Pecana Chocolata Ice Cream

Banana bread was so 2020. Why was that exactly? My hunch is that many people were trying their hand at baking for the first time and the forgiving banana bread is a solid gateway to the world of baking. Many households also suddenly became aware of the faux pas of letting bananas go to waste. And true, the adorable banter between Samin Nosrat and Hrishi Hirway on their podcast, Home Cooking had us all craving this delight. (Note: in case you lost track, the promised bread was finally delivered in December of 2021). 

If you made your share of banana bread in 2020, and maybe even moved on to smoothies or waffles in 2021, you’re ready for a new outlet for your extra brown bananas. This ice cream is just the thing. We use the worst of the worst (or the best of the best depending on how you look at it) over ripe bananas and extract all of their flavor into a mixture of milk, cream, sugar and eggs. After it churns, we stir in chocolate chips and pecans for a little twist on a favorite from a certain famous ice cream maker in Vermont. Chunky Monkey was taken, so I asked for input on the name and my dad delivered with Banana Pecana Chocolata. I think it sounds like the lyrics in “Lady Marmalade”. It’s fitting.

Banana Pecana Chocolata

Yield: about 1 quart 


What You Need:

  • 3 extra ripe bananas, peeled and sliced into 1-inch pieces

  • ¼ - ½ vanilla bean (about ½ inch piece)*

  • 2 cups half-and-half, light cream, whole milk or combination

  • 1 tablespoon tapioca starch

  • ½ cup sugar, divided

  • ¼ cup dry milk powder

  • 3 egg yolks

  • 1 cup heavy cream

  • ¾ cup pecan halves

  • ½ cup semisweet chocolate chips or chunks

*Note: You can use 1 teaspoon vanilla extract in place of the vanilla bean. Add it in Step 6.

What You Do:

  1. In a medium pot, combine bananas with the half-and-half or milk. Carefully scrape out the insides of a vanilla bean and add scraped bits plus the pod to the pot. Over medium low heat, bring just to a simmer. It should be lightly steaming. Remove from the heat and steep for 30 minutes.

  2. Strain into a clean bowl. Press as much liquid as possible from the banana pulp. discard solids.

  3. In a small bowl, combine about 2 tablespoons of the banana milk with the tapioca starch. Set aside.

  4. Pour about ¼ cup of the banana milk back into the pot. Add ¼ cup of the sugar and the dry milk powder. Whisk until smooth. Add the remaining banana milk back to the pot. Bring to a simmer over medium low heat. 

  5. In another bowl, beat the egg yolks with the remaining ¼ cup sugar with a handheld mixer or a whisk, until smooth and slightly pale yellow. 

  6. When the egg yolks are lightened and the milk mixture just begins to steam, temper the egg yolks: while whisking constantly or with the mixer running on medium speed, add about 2 tablespoons of the hot milk mixture to the egg yolks. Add another 2 tablespoons and beat thoroughly. Repeat until you’ve added about 1 cup of the milk mixture. Pour the contents of the bowl back into the pot along with the tapioca starch mixture you set aside. (Add the vanilla extract, if using). 

  7. Stir constantly over medium low heat until the mixture thickens enough to coat the back of a spoon. Be patient, this could take about 6-10 minutes or longer. Stir constantly so that the custard does not solidify on the bottom of the pot. Strain through a mesh strainer into a clean container. Cool completely in an ice bath. Stir in the cream. Refrigerate overnight or up to 24 hours. 

  8. Meanwhile make sure your ice cream churner bowl is freezing and toast the pecans: Preheat your oven to 350 degrees. Spread pecans out on a baking sheet and toast for about 7-9 minutes or until just starting to brown.

  9. The next day, freeze in an ice cream churner according to the manufacturer instructions. When the ice cream is nearly fully churned, (it should double in volume) or after about 20 minutes, add the chocolate chips and pecans with the churner still running. Stir until evenly distributed. Enjoy immediately or Transfer to a freezer safe container.

Quick & Saucy Ginger Garlic Meatballs, Two Ways

Quick & Saucy Ginger Garlic Meatballs, Two Ways

Here are some pointers for how to get a meal on the table in under 30, along with a Garlic Ginger meatball recipe that can be served with one of two delicious sauces (Citrus and Ginger Glaze or Spicy Red Curry) and a variety of vegetable sides. Your weeknights just got easier and more delicious.

Pumpkin Mole Bisque

I’ve been making this bisque for so long that I’ve since forgotten my initial inspiration for pairing mole sauce with pumpkin. It’s possible it was unintentional, putting Pumpkin Mole Bisque in the company of genius accidental inventions like post-it notes, penicillin and play doh. More likely, however, the seasonal alignment and compatible flavor profiles of pumpkin and mole sung to me when I discovered both stashed in my freezer.

This Oaxacan-influenced mole is sweet with spices — cinnamon, allspice and cloves — normally found in pumpkin pie spice. But it’s also smoky from the dried chili peppers (I use ancho, guajillo and pasilla) and cumin seeds. If you’re making the mole from scratch, you’ll still have enough remaining after your pot of bisque for a meal of enchiladas, as well as some to store in your freezer. If you have an already prepared batch of mole (like the jar you froze after last May’s Margaritas & Mole class or paste you bought at a specialty market), this rich and decadent bisque comes together simply with just 5 plant-based ingredients. Simmer the whole roasted pumpkin flesh with coconut milk, vegetable broth and the smoky mole sauce. Blend this in your high speed blender (I use a Vitamix) to ensure silky smooth results. Top with a dollop of plain yogurt, coconut cream or sour cream and toasted pepitas and sesame seeds.

Pumpkin Mole Bisque

Yield: 18 cups or about twelve 12-ounce portions


What You Need:

  • 2 cups of mole sauce (about half of recipe below)

  • 1 medium pie or sugar pumpkin, or kabocha or buttercup squash

  • 1 teaspoon salt, divided

  • 4-5 cups water or vegetable stock or combination

  • one 15-ounce can coconut milk

  • 2 tablespoons maple syrup, optional

For complete instructions on how to roast a whole pumpkin and other ideas for how to use the flesh, see Possibilities for Fresh Pumpkin Purée.

What You Do:

  1. Preheat the oven to 400 degrees. Cut off the stem of the pumpkin and then slice in half from top to bottom. Scoop out the seeds and set aside. (You can use the fresh pumpkin seeds in addition to or in place of pepitas for the mole sauce or garnish.)

  2. Sprinkle salt on the cut side of the pumpkin, then place the pumpkin halves cut side down onto a parchment-lined baking sheet. Bake until pumpkin flesh is soft and scoopable, about 45 minutes. 

  3. While the pumpkin is roasting, make the mole sauce. See recipe below.

  4. Remove pumpkin from the oven and let it cool for about 5 minutes. Scoop flesh from the pumpkin and discard the skin.

  5. To a large soup pot, add the mole sauce, scooped pumpkin flesh, 4 cups water or vegetable stock, coconut milk, and ½ teaspoon salt. Bring to a simmer, breaking up the pieces of pumpkin. Simmer for 15 minutes or until the pumpkin is very soft. 

  6. Transfer in batches to a high speed blender and blend on high speed until smooth and creamy. Alternatively, use an immersion blender and blend until soup is consistently smooth and creamy. 

  7. Transfer back to the pot, and add salt and maple syrup to taste. Serve or simmer on very low heat for up to 1 hour longer. 

  8. Serve with a dollop of plain yogurt, sour cream, or coconut cream and toasted sesame seeds and pepitas, if desired.

Mole Sauce

Yield: about 4 cups

What You Need:

  • 3-5 whole dried ancho chili peppers, stems removed* 

  • 3-5 whole dried guajillo chili peppers, stems removed* 

  • 3-5 whole dried pasilla chili peppers, stems removed* 

  • ½ cup raisins

  • 3 tablespoons raw almonds

  • ¼ cup raw pepitas

  • ¼ cup sesame seeds

  • 2 whole star anise

  • 2 cinnamon sticks

  • 6 allspice berries

  • 1 tablespoon black peppercorns

  • 10 whole cloves

  • 1 tablespoon cumin seeds

  • 1 tablespoon coriander seeds

  • 4 tablespoons canola oil, divided

  • 1 large onion, chopped

  • 1 stalk rhubarb, chopped** 

  • ¼ teaspoon salt, plus more to taste

  • 4 cloves garlic, peeled and smashed

  • 1½ cups chopped fresh tomatoes or canned chopped tomatoes or tomato puree

  • 2-4 ounces Mexican or Icelandic chocolate, chopped

  • 1-2 cups vegetable stock or water as needed

*for a milder sauce, remove the seeds as well as the stem

**if fresh rhubarb is unavailable, use 3-4 small fresh tomatillos, husks removed or 2 tablespoons dried rhubarb pieces. When using dried rhubarb, add it to the soaking liquid with the raisins. 

What You Do:

  1. In a dry skillet, toast the dried chili peppers over medium heat, for about 1 minute per side. Transfer the chili peppers to a bowl and cover with hot (just boiled) water. Add the raisins. Cover and allow to soak for 20-30 minutes.

  2. In the same cleaned out skillet, over medium high heat, toast the almonds for 1-2 minutes. Remove and set aside. In the same skillet, toast the pepitas and sesame seeds for 30-60 seconds. Shake or stir the pan frequently to prevent burning. Transfer to a plate or piece of parchment to cool. Set aside with the almonds. Reserve about a teaspoon each of sesame seeds and pepitas for garnish.

  3. In the same cleaned out skillet, over medium heat, toast the star anise, cinnamon stick, allspice berries and peppercorns for 1-2 minutes on medium-high heat, until fragrant. Add the whole cloves, then cumin seeds and coriander seeds and toast for another 30-60 seconds or just until fragrant. Shake or stir the pan frequently to prevent burning. Transfer to a plate or piece of parchment to cool. Once cool to touch, grind the toasted spices in a spice grinder or mortar and pestle. 

  4. Wipe out the skillet and add 2-3 tablespoons of oil. Add the onion, rhubarb or tomatillos, and about ⅛ teaspoon of salt. Sauté until lightly browned. Add the garlic and sauté a minute longer. Add the ground spices and sauté about 1 minute until fragrant, Add the tomatoes plus another ⅛ teaspoon of salt and cook until reduced, about 5 minutes. Transfer to a blender. 

  5. Strain the chili peppers and raisins. Do NOT DISCARD the liquid. 

  6. To the blender, add the toasted almonds, pepitas and sesame seeds, drained chili peppers and raisins, and blend with the onion and tomato mixture until smooth. Add strained liquid from chili peppers and raisins as needed to thin the sauce to the consistency of spaghetti sauce or to add heat. Taste and add salt as needed.

  7. Add the chocolate and puree until smooth. If needed, return to the heat and simmer until the chocolate has melted. Add stock or water 1 cup at a time if the sauce is too thick. Optional: transfer back to a blender or blend with an immersion blender to get a smoother sauce. Taste and add salt if desired. 

  8. At this point, you can reserve unused sauce for another use. Store in freezer-safe containers for up to 6 months.

photography in this post by The Copper Spoon Collective

Spicy New Orleans Style Shrimp and Grits

Spicy New Orleans Style Shrimp and Grits

This recipe for Spicy New Orleans Style Shrimp and Grits is one of my most requested. It comes together in less than 30 minutes and only requires a handful of easy to procure ingredients, most of which you already have. The spice level is adjustable. And it has a showstopper presentation so you can brag about your chef skills.

Orecchiette with Spicy Turkey Sausage and Garlicky Broccoli Rabe

JPEG image-4596A3F8EBF9-1.jpeg

What sings, “welcome to the neighborhood,” “welcome home,” or even “welcome to the world”? What do you bring a loved one in need of an easy reheatable hearty meal that has everything in one bite? If you were to cook up all of your love and pack nourishment into a transportable container, what would it be?

Orecchiette with Spicy Turkey Sausage and Garlicky Broccoli Rabe is my love in a casserole dish, except that it’s not a casserole. And that’s what I love most about it. Deliverable meals need not be gloppy cheese-laden casseroles with mystery ingredients. When providing a meal for someone who’s just moved down the street, groggily brought their newborn home, or is recovering from surgery, there are a few criteria you keep in mind:

  1. convenience - is the meal ready to eat, essentially, with minimal steps and unfussy fixing?

  2. health - is the meal well rounded and going to provide nutrition in the form of all food groups?

  3. comfort - somewhat but not always related to #2, does the meal, for all intents and purposes, include a built-in hug?

  4. transport - can the meal be easily packaged into a spill-proof & space-saving container without compromising its integrity?

Blanched broccoli rabe being shocked in an ice bath.

Blanched broccoli rabe being shocked in an ice bath.

I have a few tricks for getting this classic pasta dish just right and perfect for reheating. First, blanch and shock the broccoli rabe. The brief plunge in salted boiling water draws out its bitterness. Add an ice-cold water bath and you’ve also now preserved its green for a more appetizing look even after the 3rd reheat. [Time saver tip: use the same pot of water for cooking the pasta]. Next, use a good quality fresh sausage that is either loose or can be cut out of its casing. If turkey is unavailable, go for chicken (and use more olive oil) or pork, and if your recipient doesn’t like spice, use sweet Italian in place of hot. But avoid that precooked nonsense at all costs. Lastly, you need to under cook the pasta when boiling it. When you finish cooking the orecchiette in the sausage, broccoli rabe, garlic and broth, it will all come together in a flavorful, luscious sauce.

Cool completely before packing it up and don’t forget the Pecorino Romano cheese for sprinkling on top.

Yield: 6 servings

What You Need:

  • Kosher salt or sea salt

  • 1-2 bunches broccoli rabe

  • 2-3 tablespoons extra virgin olive oil, divided

  • 1 pound spicy Italian turkey sausage, loose or removed from casing

  • 5-6 cloves garlic, thinly sliced

  • ¼ teaspoon crushed red pepper flakes

  • 1 cup vegetable or chicken stock

  • 1 pound orecchiette or other sturdy pasta

What You Do:

  1. Bring a large pot of water to a boil. Add a generous palmful of salt.

  2. Trim off and discard the ends of the broccoli rabe. Roughly chop broccoli rabe into 1-inch long pieces. Drop into the salted boiling water. Boil 1 minute. Do not drain the water. Scoop out broccoli rabe and transfer immediately to a bowl of ice water or run under very cold water. Drain and set aside. Bring the pot of water back to a boil.

  3. Heat a thin layer of olive oil over medium high heat in a large sauté pan. Add the sausage and break up into small bits with a wooden spoon. Tip the pan to gather a pool of oil or sausage fat. To the fat, add garlic, red pepper flakes, and a pinch of salt. Sauté 30 seconds and stir. Continue to sauté until sausage is fully cooked and no longer pink.

  4. With a slotted spoon, remove the sausage from the pan and set aside. Add the stock to the pan and cook until reduced by about half.

  5. Meanwhile, add the pasta to the boiling water, stir and cook until al dente, about 1-2 minutes less than package instructions for dry pasta.

  6. Add the sausage back to the sauté pan. Add the broccoli rabe. 

  7. Drain the pasta, reserving about ½ cup pasta cooking water. Transfer drained pasta to the sauté pan with 2-3 tablespoons of pasta cooking water. Cook and stir it all together, about 2-3 minutes, adding more pasta cooking liquid if needed. 

  8. Drizzle a little more olive oil over the top and serve with grated cheese if desired.

Asparagus Nests

Asparagus Nests

This one-pan meal can be pulled together in just 12 minutes and requires only 8 ingredients, including salt, pepper and oil. I’ve fed it to my family for brunch, lunch and dinner, and they asked for more for breakfast the next day. Round out the meal with a side of creamy polenta or grits. Or serve it over a bed of chewy farro or wheat berries. If you can spare the extra mostly hands-free cooking time, my favorite accompaniment to this, however, is Rosemary Roasted Potatoes.

Greatest of All Time Lentil Soup

Greatest of All Time Lentil Soup

A smoky and subtly spicy take on a classic, you start this soup by gently sautéing a flavor bomb of onion, garlic, ginger, tomato paste, ground cumin and smoked paprika. Instead of taking out a cutting board to mince anything, I use my already prepared Triple Aromatic Puree, a blend of onion, garlic and ginger that I make in large batches and store in my freezer.

Kale Spaghetti Cacio e Pepe

Kale Spaghetti Cacio e Pepe

When your “petite” child is eating only buttered noodles for any stretch of time, you find creative ways to sneak in vegetables, including putting the greens directly into the noodles themselves. This Cacio e Pepe, with fresh homemade kale noodles is perfection - everything you love about Cacio e Pepe but with a pile of greens served up in herbaceous noodles and gorgeous contrasting colors.

Cranberry Beef Ragu

Cranberry Beef Ragu

If you made a rib roast or prime rib for your holiday meal, you might be swimming in leftovers. My favorite repurposing of a leftover hunk of meat is ragu… to be served on pasta, of course. Take any hunk of meat and render the fat, cook some shallots, and in this case, hot peppers and ginger in that fat, deglaze the pot and add whatever leftovers will work with that meat. A little bit of liquid and you’re 30 minutes of pressure cooker (or instapot) time away from the most decadent (nearly free) pasta sauce your pappardelle has ever seen. Then crush this leftovers game if you have a nearly flat bottle of boozy cider, solidified gravy, and a jar of cranberry sauce just wondering its fate in that same forbidden forest.

Garlicky Stuffed Mushrooms

Garlicky Stuffed Mushrooms

Mushroom caps stuffed with garlic, mozzarella and more mushroom, one of the first recipes I learned from my mom. They are really quite simple. Just don’t get too good. You’ll be asked to bring them to every single gathering in place of anything else you are likely very well equipped to cook.

Sticky Habañero Cauliflower Bites

Sticky Habañero Cauliflower Bites

I seem to have gained a reputation as the neighbor who will happily take your excess food. Did an online grocery order mishap leave you with 12 dozen clams instead of 12 clams? Call Chef Laura. She’ll know what to do with them. Did India’s spice markets intoxicate you with their aromas? Laura will take some of those souvenirs off your hands. Did your pepper plants react like a pot full of gremlins in the summer rain? Chef Laura knows just the sauce, hot sauce.

Kale Chips

You need a 4-ingredient simple snack that is 99.7% vegetable super food. This is it. Be careful, they will disappear faster than you expect.

For best results, I recommend baking these in a convection oven. The fans and dry heat of the convection oven dry out the kale evenly for a crunchier chip that retains some green. But if, like me, you don’t have a convection setting on your oven, don’t fret. Bake at a slightly higher temp in a conventional oven and flip and turn the kale frequently.

I tend to use my Red Russian kale for this recipe, mostly because I reserve the Lacinato kale for salads and pasta dishes. I also like the smooth leaves of the Red Russian kale for crisping into a chip, but you can use any variety you have available.

What You Need:

Go easy on the red pepper flakes! The heat intensifies when the kale cooks down.

Go easy on the red pepper flakes! The heat intensifies when the kale cooks down.

  • 1 bunch kale, any variety

  • ¼ teaspoon kosher salt

  • ⅛ teaspoon red pepper flakes, optional

  • 1 ½ tablespoons olive oil 

What You Do:

  1. Preheat a convection oven to 325 degrees or a conventional oven to 350 degrees F.

  2. Remove kale leaves from stems and discard stems (see below). Tear larger leaves into 2-inch square pieces. Wash and spin dry. Pat dry with a clean kitchen towel.

  3. Transfer dry kale to a bowl and sprinkle with salt and red pepper flakes. Add olive oil and toss to coat evenly. 

  4. Transfer to a baking sheet (parchment optional) and spread out into a single layer. Bake for 15-20 minutes or until crispy, flipping halfway. Remove from the oven and allow them to cool until crisp.

Tip: To remove leaves from stems (photo above), hold the stem in one hand. Pinch the leaves between your thumb and index finger of your other hand. Gently pull the leaves along the stem away from the stem end. Don’t throw away the stems - use them in vegetable stock.

Seasonal Swap Out: Baked Fruit Desserts

Seasonal Swap Out: Baked Fruit Desserts

You won’t need another baked fruit recipe ever again because this post has you covered from berries and rhubarb to peaches and apples. With 6 baking variations (crisp, crumble, cobbler, pie, galettes, and crumb pie) that can be applied to at least 12 fruits, that’s 72 potential desserts for a year-round sweet tooth.

Herb Infused Syrups

Wait! Stop! Despite what you’ve been told, you should not wrap your freshly harvested herbs in paper towels and store them in your freezer for future use. Let’s be real, you won’t use them. The future leaves, brittle and flavorless, won’t resemble the fresh greenery they once were, and this is a tremendous waste of paper towels, plastic bags and freezer space! Transform those herbs into something that is preservable, portable and ripe with many uses. Some typical creations include pesto, chimichurri, salad dressings and marinades, but have you tried herb infused syrups for use in cocktails, mocktails or baked goods? This recipe requires only about 5 minutes of active time, 3 ingredients [including water] and produces something with countless uses that lasts for months.

Herb Infused Simple Syrups

Yield: 1 cup syrup

What You Need:

  • ½ cup sugar

  • ¾ cup water

  • 1 loosely packed cup of leaves of mild herbs such as mint, thyme, and basil or ½ cup stronger herbs such as rosemary, lavender and sage

What You Do:

  1. In a small pot, combine sugar and water. Over high heat, stir until sugar dissolves. Add the herb leaves and bring to a boil. 

  2. Remove from heat and allow herbs to steep and cool for about 30 minutes.

  3. Strain through a fine mesh strainer. Discard the solids.

Note: For a more concentrated, thicker syrup to use in or on baked goods in place of corn syrup, maple syrup or honey, return to stove. Heat on medium high for 5 minutes until reduced and syrupy.

To freeze: Transfer to small jars or plastic containers with tightly fitting lids. Due to the sugar content, the liquid will not freeze completely solid. You can freeze in ice cube trays and then transfer to plastic bags, but beware that cubes will remain slightly soft. Use within 6 months.

Variations:

Ginger Syrup - Use ½ cup sliced ginger root instead of herbs or in combination with herbs to make ginger syrup. Ginger + Mint is particularly nice.

Rhubarb Syrup - Add one stalk of rhubarb, cut into 1 inch chunks. Rhubarb + Thyme is a great pairing.

Citrus Syrup - In place of some of the water, use ¼ cup orange juice or 2 tablespoons lemon juice. You should still have ¾ cup total liquid. Sage + Orange is a great combination. Lemon + Lavender is another.