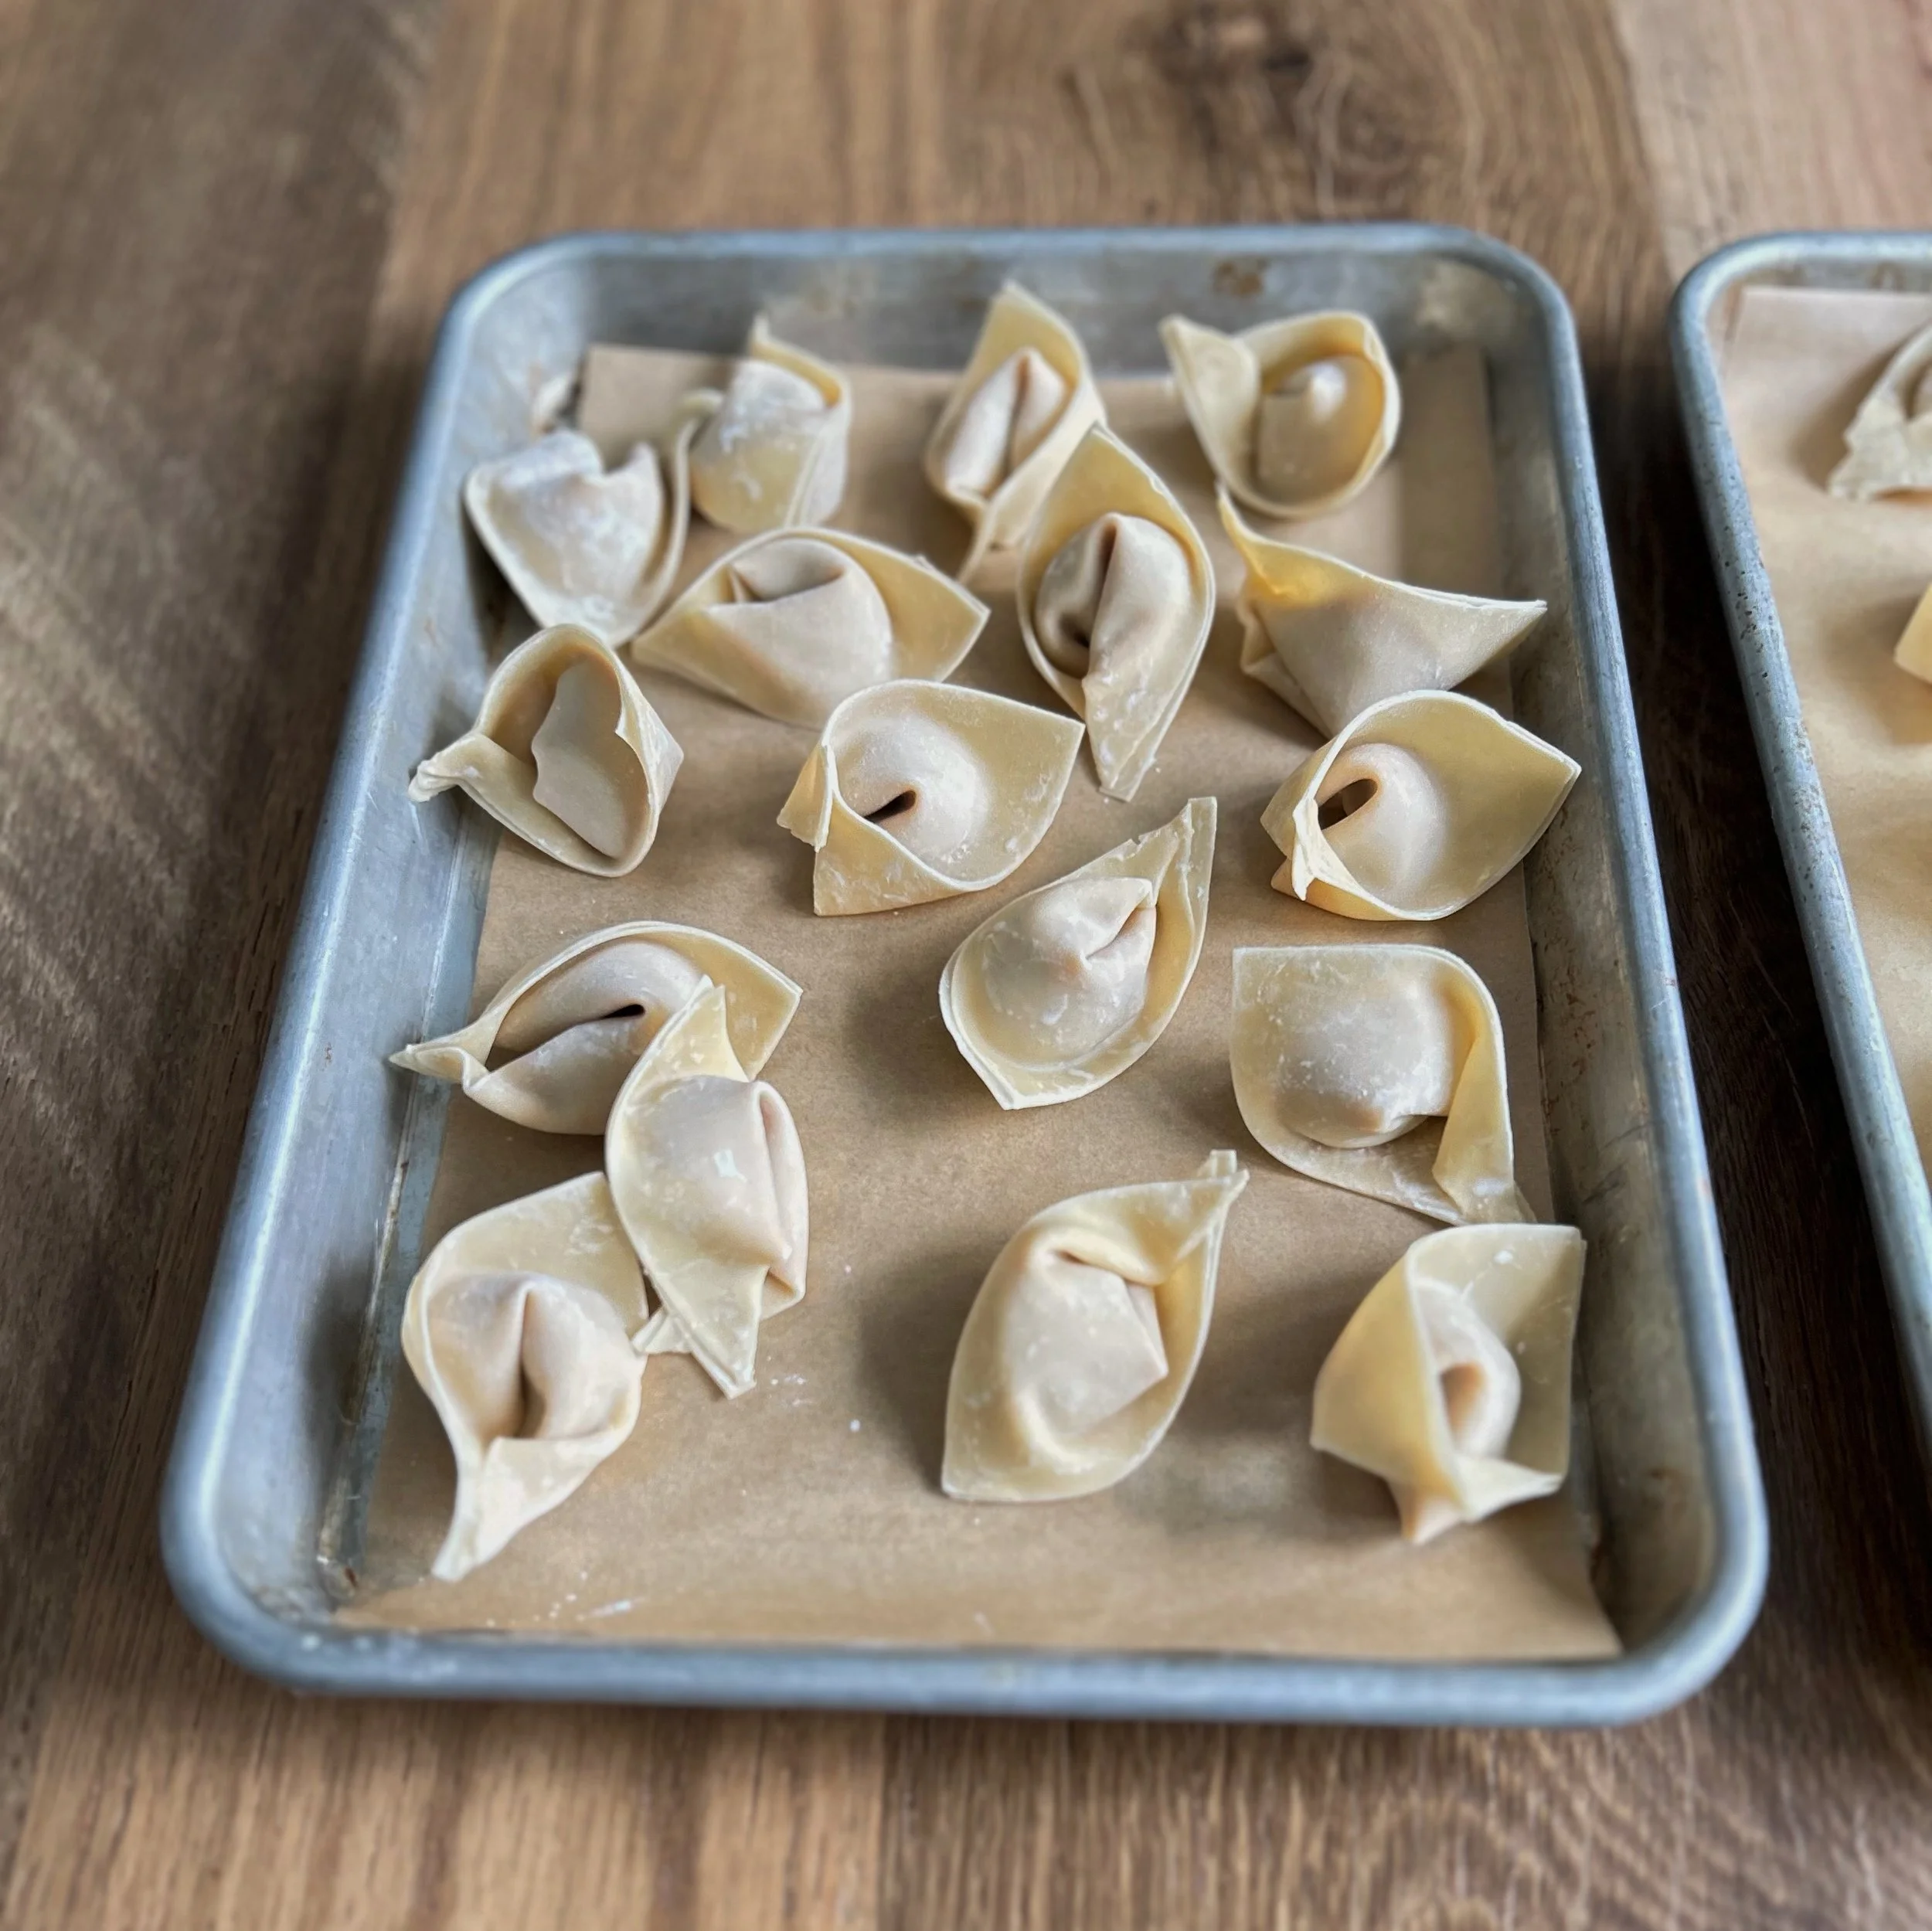
#cookingtechniques

Baking Terms Decoded

I hope to define and explain some confusing baking terms so that your holiday baking everyday baking is a success.

When they are asked to fold egg whites into the Italian Rainbow Cookie dough or mix whipped cream into the zabaglione and mascarpone mixture for Tiramisu, students in my baking classes will occasionally reenact the hilarious scene from *Schitt's Creek*. This scene, with humor, illuminates how inexperienced Moira and David are in the kitchen, yes. However, it also highlights a common issue with recipe writers who assume that all bakers and cooks understand culinary terms. It serves as a helpful reminder, along with the questions I receive from my students, to be clearer in my recipe writing and instructions for bakers of all experience levels.

FOLD

While "folding" is simple, it is not intuitive. Many bakers benefit from a demonstration and an explanation of the technique when they encounter it for the first time. More importantly, understanding why you need to fold the ingredients can clarify the method involved in folding. Folding is a gentle way of mixing dough or batter with the intention of avoiding deflation of the ingredients, particularly when working with whipped egg whites or whipped cream, which are essential for trapping air. To fold, first use a flat spatula (not a spoon, never a whisk). Sweep the spatula along the curve of the bowl, moving from the bottom to the top and turning the bowl as you go.

Photo by Copper Spoon Collective

CREAM

This term can be particularly confusing in a recipe because it can be unclear what it means to "cream." Additionally, it often gets mistaken for an actual ingredient. The recipe reader needs to determine whether the word "cream" is being used as a noun or a verb and check if any type of cream (heavy, light, or whipping) is listed among the ingredients.

Once you establish that the verb is instructing you to cream the ingredients—usually butter or a combination of butter and sugar—you should mix them at a high speed using an electric mixer (to save your arms). Continue mixing until the butter and other ingredients become light, fluffy, and creamy in texture. You’ll notice a lighter color compared to the initial state of the butter, as it has incorporated air from the high-speed mixing.

KNEAD

When you knead dough, you are vigorously manipulating it, which is quite the opposite from folding. The goal of kneading is to develop gluten, increasing the strength and elasticity of the dough. My favorite method of kneading involves pushing the dough across the counter with the heels of my hands, then bringing it back in front of me, patting it into a ball, and repeating the process. For doughs that require kneading, it is very unlikely that you can overknead when working by hand.

Dock

If a recipe instructs you to "dock" the dough, you are likely preparing a pie or something else with a crust. Docking is a process of poking holes, typically with a fork - or a unitasking docking tool, which you do not need - into the rolled out and shaped pie crust in the bottom of your pie pan or tart pan. The purpose of docking is to create spaces for steam and other gases, such as carbon dioxide, to escape while the crust bakes. This process prevents the crust from rising too much or developing large air pockets, ensuring that the baked bottom crust remains relatively flat. Docking can also be used for flatbreads and pizzas to help keep them flat during baking.

Punch Down

I’m including this because it’s fun, and I love the picture! In some yeasted or risen doughs, such as cinnamon rolls or challah, you might be instructed to "punch down" the dough. This technique is used to deflate some of the carbon dioxide released by the yeast, making the dough more manageable for shaping, rolling out, and filling. Additionally, it redistributes the yeast so that the dough can continue to rise in a second proof. You literally use your fist and punch into the risen dough. It’s a fun process!

Have you encountered other confusing baking or cooking terms? Put your questions in the comments below. I’d be happy to answer them.

Make Dessert with Less Sugar

Many years ago, before I attended the Natural Gourmet Institute's chef training program focused on health-supportive cooking, my understanding of low-sugar or sugar-free desserts was quite different. Then, I typically substituted Splenda or another artificial sweetener for cane sugar in conventional chocolate chip cookie or cake recipes. However, I have since learned to use naturally sweet, plant-based ingredients and enhance them with effective culinary techniques to create decadent desserts without added sugars or artificial ingredients. As a result, my tolerance for overly sweet desserts has decreased, and I now prefer treats with less sugar overall.

Here are my tips for preparing naturally sweet, low-sugar desserts. And some of my favorite desserts, many of which incorporate more than one of these strategies.

Tip #1 Add Air

Looking for desserts with less sugar? You might be surprised to learn that incorporating airiness can compensate for the reduced sugar content. You can create light and flavorful options like sorbet and mousse by whipping air with a blender or food processor into frozen fruit or melted chocolate. The delightful, cloud-like consistency turns simple frozen fruit into a decadent dessert. Natural emulsifiers and thickeners such as silken tofu, nut butter, bananas, and avocados also contribute to a wonderfully creamy texture. Side note: whipped cream doesn’t need added sugar!

My favorites: 2-Step Seasonal Fruit Sorbet (shown in photo), Banana N’ice Cream, Silken Dark Chocolate Cashew Butter Mousse

Tip #2 Use Dried Fruit

Photo by Copper Spoon Collective

Sweeten desserts naturally by incorporating dried fruits such as dates and raisins. Pulse pitted dates with other dried fruits, nuts, cocoa powder, or spices to create subtly sweet energizing bars or bites. Alternatively, soak the dried fruits in hot water to rehydrate them before blending them into cake batters or custards for added sweetness. Using dried fruit or date sugar also adds the nutritional benefits of vitamins and fiber, which are found in whole fruits. Additionally, it enhances the depth of flavor and interest in your desserts!

My favorites: Pumpkin Seeded Date Nut Balls (shown in photo), Spiced Sweet Potato Custard

Tip #3 Caramelize

When you cook fruit, vegetables, and even grains by toasting, roasting, grilling, or you brulee to get some color, texture and caramelization, you bring out the natural sweetness and deepen flavors that you didn’t even know were there. Try this with apples, peaches, pineapple, mango, and even sweet potatoes or nuts to achieve dessert flavors and complexity with produce alone.

My favorites: Baked Apple Crumbles in their own Juice (shown in photo), Grilled Pineapple

Tip #4 Dark Chocolate

No surprise that chocolate is a delightful sweet treat, and dark chocolate is a great option as it contains less sugar and can also be dairy-free. It offers numerous health benefits, including antioxidants, improving heart health, and providing essential minerals like magnesium, iron, and zinc. Additionally, dark chocolate can help boost your mood—there's a reason J.K. Rowling chose chocolate as the antidote for Dementors!

You can enjoy dark chocolate alone or combine it with fresh or dried fruits, nuts, nut butter, eggs, and coconut. It can also be used to make delicious truffles, pudding, and confections with little to no added sugar.

My favorites: Dark Chocolate Dipped Strawberries or Dried Apricots, Almond Cookie Butter and Jelly Cups in a Dark Chocolate Shell (shown in photo)

Tip #5 Reduce

To create a wonderfully sweet and intensely flavorful dessert, make a reduction. Cooking down fruit intensifies its flavor while reducing juice, wine, and even vinegar enhances the sweetness and highlights dimensions like minerality and acidity. Fruit-based desserts, such as pies, tarts, and cobblers, require less sugar when the fruit is reduced over high heat, allowing liquid to evaporate and natural flavors to intensify into jamminess. Consider dishes like Bananas Foster and Cherries Jubilee, where the caramelization of natural sugars and a reduction eliminate the need for added sugar. Alternatively, you can cook down juices to create a drizzling sauce.

My favorites: Plum Tarte Tatin (shown in photo), Peach Galette, Poached Pears in Apple Cider Reduction

Tip #6 SPICE IT Up

To enhance flavor and compensate for reduced sugar, consider adding warming spices such as cinnamon, cardamom, and ginger. These spices not only bring interest and depth but also offer their own natural sweetness. You can infuse whole spices into custard mixtures or simmering liquids, while ground spices work well in batters and doughs.

My favorites: Spiced Dark Chocolate Pot De Creme, Chai Latte Ice Cream, Spiced Squash and Apple Crumble Bread

Keep in mind that you can reduce sugar in recipes to maintain overall flavor and sweetness, but it's important to proceed with caution. Sugar often contributes to the texture and moisture of baked goods, and it helps batters spread, particularly in cookies. Therefore, don't simply omit or drastically reduce sugar without considering its role in the recipe.

3 Mistakes You're Making with Spices

Is your cooking bland despite all of the spices you incorporate? Are you searching for garlic or cumin flavor? Chances are you’re making some of these mistakes when cooking with spices.

And if you’re not cooking with spices at all, well then, you are definitely making a mistake.

Mistake #1 Waiting too Long

When your sauce or sauté is nearly done, it's too late to infuse it with the power of curry, garlic or berbere. Add fresh aromatics, ground spices and dried herbs early to ensure they bloom in the oil and flavor the entire dish. Since the flavor and aroma compounds of spices are fat soluble, they need to be added to the cooking oil to make them available to your palate.

photo by Copper Spoon Colletive

Photo by Copper Spoon Collective

Mistake #2 Skipping the Toast

When you toast spices (in a dry skillet until they take on a bit of color and become aromatic), their volatile oils are brought to the surface, offering dimensions of flavor and texture. Use immediately, grind into spice blends or coarsely crush. Toasting is especially valuable if the spices won't be cooked into the food, like cumin seeds in fresh raita. Bonus: your kitchen will smell amazing.

Mistake #3 Using Old Spices

I hate to be the bearer of bad news, but spices have a shelf life. Don't worry, you won't get sick from old spices in your pantry, but you will miss out on their flavor potential if they are older than 6 months (ground) or 1 year (whole). Tips: Buy spices in small quantities, get whole to grind yourself, and store in a cool dark place in tightly sealed jars. Before you throw away those spices from 2019, conduct a toast test (Heat a little bit in a sauté pan and check for aroma. If nothing, you might need to replace them or use more than a recipe calls for.)

Put your questions in the comments below about cooking with spices. I’d be happy to answer them.