technique

3 Mistakes You're Making with Spices

Is your cooking bland despite all of the spices you incorporate? Are you searching for garlic or cumin flavor? Chances are you’re making some of these mistakes when cooking with spices.

And if you’re not cooking with spices at all, well then, you are definitely making a mistake.

Mistake #1 Waiting too Long

When your sauce or sauté is nearly done, it's too late to infuse it with the power of curry, garlic or berbere. Add fresh aromatics, ground spices and dried herbs early to ensure they bloom in the oil and flavor the entire dish. Since the flavor and aroma compounds of spices are fat soluble, they need to be added to the cooking oil to make them available to your palate.

photo by Copper Spoon Colletive

Photo by Copper Spoon Collective

Mistake #2 Skipping the Toast

When you toast spices (in a dry skillet until they take on a bit of color and become aromatic), their volatile oils are brought to the surface, offering dimensions of flavor and texture. Use immediately, grind into spice blends or coarsely crush. Toasting is especially valuable if the spices won't be cooked into the food, like cumin seeds in fresh raita. Bonus: your kitchen will smell amazing.

Mistake #3 Using Old Spices

I hate to be the bearer of bad news, but spices have a shelf life. Don't worry, you won't get sick from old spices in your pantry, but you will miss out on their flavor potential if they are older than 6 months (ground) or 1 year (whole). Tips: Buy spices in small quantities, get whole to grind yourself, and store in a cool dark place in tightly sealed jars. Before you throw away those spices from 2019, conduct a toast test (Heat a little bit in a sauté pan and check for aroma. If nothing, you might need to replace them or use more than a recipe calls for.)

Put your questions in the comments below about cooking with spices. I’d be happy to answer them.

Seasonal Swap Out: Baked Fruit Desserts

Seasonal Swap Out: Baked Fruit Desserts

You won’t need another baked fruit recipe ever again because this post has you covered from berries and rhubarb to peaches and apples. With 6 baking variations (crisp, crumble, cobbler, pie, galettes, and crumb pie) that can be applied to at least 12 fruits, that’s 72 potential desserts for a year-round sweet tooth.

Plump Pasta Pillows in 3 Preparations

Plump Pasta Pillows in 3 Preparations

While the shape of a gnoccho might resemble a knuckle or a small knot, the texture mimics a pillow - light, fluffy, and airy when prepared properly. Vegetables gently mixed into the dough along with flour and an egg help ensure this airiness. What follows is a method for preparing gnocchi with squash or pumpkin, sweet potatoes and beets, three ingredients in abundance all fall and winter long around here.

Rustic No Fuss Eggplant Arrabbiata

Arrabbiata is a spicy tomato sauce made with lots of garlic and chili peppers. Although it literally translates to “angry,” no one, unless perhaps Tom Brady, will be angry if you make this Rustic No Fuss Eggplant Arrabbiata for dinner tonight. This dish can be adjusted, with equally delicious results, to suit vegans, those who eat gluten free, and/or eaters who are allergic to eggs! Win-win-win.

fullsizeoutput_5106.jpeg

The spicy kick is not the only thing setting this apart from your average eggplant parmesan or eggplant rollatini. Those traditional configurations of eggplant, sauce and cheese are much more particular, and I dare say, unnecessary. Admittedly, I appreciate an impeccable eggplant parmesan. And my mother’s meticulously rolled eggplant rollatini, held together by toothpicks before being baked in the oven might just be the inspiration for this dish. But here’s why this Rustic No Fuss Eggplant Arrabbiata should replace all of that…well…fuss:

  1. No frying. No mess. No three step dredge resulting in a once-normal hand transformed into 5 breaded thumbs.

  2. It can be made gluten free — easily. See #1. Toasted breadcrumb topping is 100% optional.

  3. All plant. No egg. Since the eggplant is not breaded, we skip the egg dredge.

  4. Mix and match or even omit (gasp!) the cheese. Fresh Mozzarella is a classic in eggplant parmesan and ricotta makes for a luscious rollatini, but here you can use either, both, add parmesan or pecorino romano, or leave out the cheese entirely. And thus (see #3), this dish can be made vegan without any of those questionable imitation vegan “cheeses”.

  5. Any sized casserole or baking dish with high sides will work. This fuss free eggplant bake doesn’t require a perfect fit, normally forcing you to transfer the partially layered contents of your eggplant bake into another better fitting vessel, three times, creating a sink full of dishes before you’ve put anything in the oven.

  6. No rolling. No toothpicks. Sorry to take away your fun, mom.

  7. I’m sure there is a 7th reason and perhaps even an 8th, but I want to share this with you before eggplant season has passed.

Rustic No Fuss Eggplant Arrabbiata

Serves: 4-6

What You Need:

  • 2 medium eggplant

  • 1-2 teaspoons kosher salt, plus more to taste

  • 4-5 tablespoons extra virgin olive oil, divided

  • red pepper flakes (crushed red pepper), to taste

  • 1 cup ricotta cheese or 8 ounces fresh mozzarella, sliced or 3-4 tablespoons pecorino romano or combination

  • freshly ground black pepper, to taste

  • 1-2 cups Quick Spicy Tomato Basil Marinara or your favorite version

  • 1/2 cup bread crumbs (seasoned if you like), optional

What You Do:

  1. Preheat the oven to 400 degrees.

  2. If desired, peel the eggplant. (Note: I always leave the skin intact for color, flavor and nutrients but if you want your overall bite to have a more silky texture, peel the eggplant). Slice eggplant into 1/4 inch thick slabs (or rounds if that is your preference).

  3. Lay the eggplant slices out in a single layer on the cutting board or baking sheets. Sprinkle liberally with kosher salt. Flip and sprinkle salt on the other side. Allow to sit for at least 10 minutes so that the moisture sweats out of the eggplant.

  4. Using a clean kitchen towel, pat the eggplant dry. Flip and pat dry on the other side as well.

  5. Transfer to a baking sheet and drizzle with about 2 tablespoons of extra virgin olive oil. Flip and drizzle olive oil on the other side. Sprinkle with red pepper flakes, if desired. Bake at 400 degrees for about 30 minutes or until eggplant is golden brown and crisp around the edges, flipping the eggplant slices and rotating the pan halfway through.

  6. Meanwhile, in a small bowl, mix cheeses together with freshly ground black pepper.

  7. In a baking dish with high sides, ladle a few spoonfuls of sauce, arrange about 1/4 of your eggplant slices in a single layer over the sauce. Dollop 1/4 of your cheese mixture across the eggplant slices. Repeat until you have used all of your ingredients, finishing with a layer of sauce on top. Sprinkle about 1/4 teaspoon of red pepper flakes on top, if desired.

  8. Bake at 400 degrees for about 30 minutes or until cheese is bubbly and lightly browned around edges.

  9. Meanwhile, in a small skillet over medium high, heat 1 tablespoon of olive oil. Add the bread crumbs and sauté, stirring frequently until lightly browned, about 4 minutes.

  10. Remove eggplant from the oven, and top with the toasted breadcrumbs. Allow to cool 5 minutes before serving.

Whole Grilled Fish with Fresh Herbs and Citrus

aSpoBkrrR9GQ%2B%2BcvpLmqcg.jpg

I used to be intimidated by recipes calling for whole fish, even after growing up with a fishing rod tucked under my arm, and even after culinary school where we covered all things fin fish. Last summer, I explored grilling whole fish. It was a lot less intimidating to work with them outdoors on a gas grill. I’ve since tested and adapted these recipes for indoor cooking, because let’s face it, we all don’t have the option of grilling all the time.

This is the start to a perfect summer night meal, when you want to expel as little effort as possible to eat something light and full flavored. Pair with some grilled vegetables or a salad and you’re a star, a sea star.

What follows is a formula for simple whole grilled fish with herbs and citrus served in 5 of my favorite ways (just updated with a new favorite). You can easily modify this formula to fit your favorite flavor combinations, seasonally available produce and local flavor. Or you can jump straight to my recipe for Whole Grilled Trout with Cilantro, Mint, Nam Pla Prik, and Cashews, which you won’t regret one bit.

WHOLE GRILLED FISH WITH FRESH HERBS & CITRUS - 4 WAYS

  1. Lemon + Parsley + Garlic + Pepper + Olive Oil garnished with Hazelnuts

  2. Orange + Parsley + Oregano + Olive Oil garnished with Olives + Capers

  3. Orange + Lime + Cilantro + Serrano + Cumin garnished with Avocado + Tomato

  4. Mint + Cilantro + Thai basil + White Pepper + Kaffir Lime Leaf garnished with Toasted Cashews + Nam Pla Prik Thai Chili Lime Sauce

  5. Preserved Lime or Lime + Ras el Hanout + Parsley

Serves: 4 - 6

What You Need:

  • 3 small whole fish, such as branzino, trout or red snapper, scaled, cleaned, & heads removed or butterflied, about 1 pound each

  • ¼ teaspoon sea salt

  • ¼ - 1 teaspoon ground pepper or other spices or spice blends

  • 1 - 2 bunches of fresh herbs

  • 2 - 3 limes, lemons or oranges, sliced or juiced for dressing

  • 1 tablespoon oil

  • ¼ cup nuts, lightly toasted

  • 1-2 chili peppers, such as jalapeno, serrano or Thai bird’s eye chili, thinly sliced

  • ¼ - ½ cup olives, pickles, capers, or caper berries

What You Do:

  1. Sprinkle sea salt and spices on the insides of the fish. Stuff each fish with few herb sprigs (leaving stems intact) and a few citrus slices.

  2. Brush the outside of each fish lightly with canola oil.

  3. Heat a grill on high heat.

  4. Meanwhile, prepare any sauces or garnishes. Juice or slice the remaining citrus, toast nuts, slice peppers, tomatoes or other fruits, pluck herb leaves from the stems and discard stems.

  5. Grill the fish over high heat, turning once, 6-7 minutes per side or until skin is crisped and flesh is flaky.

  6. Serve immediately garnished with toasted nuts, additional citrus, herb leaves, and more per suggestions above.

No grill? No problem. You can also cook this whole fish under the broiler in a cast iron skillet or broiler safe pan. Heat the pan under the broiler for about 10 minutes. Add the prepared fish to the pan and place back under the broiler for about 6-…

No grill? No problem. You can also cook this whole fish under the broiler in a cast iron skillet or broiler safe pan. Heat the pan under the broiler for about 10 minutes. Add the prepared fish to the pan and place back under the broiler for about 6-7 minutes. Flip and cook an additional 5-6 minutes on the other side.

Pantry Clean-Out Granola

I’ve been baking my own granola for years now, usually inspired by the odds and ends I find when cleaning my pantry. It’s incredibly satisfying to empty the remnants of bags of nuts, a tub of dried mystery fruit, a jar of cinnamon, and a rubber-band wrapped package of quinoa in one fell swoop! In the process, I create a wide open pantry shelf AND breakfast of champions for weeks!

Armed with some photos I took during the recent production of 60 jars for a dear friend’s wedding, I’m finally putting this granola “recipe” on the Teaching Table blog.

As the air quotes suggest, this is barely a recipe but rather a set of suggestions and instructions for assembling goodness out of any combination of nuts & dried fruit, spice, seeds, oil & sweetener. Mix and match to create a personalized granola that suits your taste and needs (or uses what you find in the back of your pantry). You can even adjust the ratios of the dry ingredients. The amounts are relative — another vote for this solution to reduce food waste! Here’s a basic formula.

Tip: For an even crunchier granola, add 1 beaten egg white to the oats mixture.

Pantry Clean-Out granola

What you need:

Ingredients for Shannon & Dylan’s Signature (vaguely Morrocan) Granola.

Ingredients for Shannon & Dylan’s Signature (vaguely Morrocan) Granola.

  • 2 ½ - 3 cups rolled (not instant nor steel cut) oats

  • ½ - 1 cup whole grains such as quinoa, millet and amaranth

  • 2 - 4 tablespoons seeds, such as sesame, chia and flax

  • 1 - 2 teaspoons of ground spice, such as ginger, cinnamon, or cardamom, or powders like cocoa and matcha tea

  • ½ - 1½ cups nuts, such as almonds, hazelnuts, walnuts, cashews and pistachios

  • ½ cup oil (melted coconut, canola, hazelnut, pistachio, grapeseed, or olive oil)

  • ⅓ cup sweetener in syrup form, such as honey, agave or maple syrup

  • ½ cup dried fruit, such as raisins, tart cherries, apricots, figs, peaches or apples, ¼ inch dice

What you do:

Some of my favorite combinations:

All of these start with rolled oats…

  • walnuts + cinnamon + canola oil + maple syrup + dried apples

  • pistachios + almonds + cardamom + sesame seeds + coconut oil + honey + dried apricots

  • almonds + cocoa powder + nut oil (hazelnut, walnut) + agave + dried cherries

  • cashews + ginger + quinoa + coconut oil + agave + coconut flakes + dried mango

  • matcha tea powder + cashews + coconut oil + agave + golden raisins

  • walnuts + pistachios + cinnamon + quinoa + grapeseed oil + honey + raisins

What goes into your favorite mixture?

Dyeing Eggs with Natural Colors

t59nzEM5SgyLWcWlti313Q.jpg

I first started exploring natural food dyes when trying to decorate my son’s birthday cake without using artificial colors from a little squeeze bottle. I knew there had to be ways to get vibrant colors out of actual foods. After discovering how to make pink, blue, green and yellow frosting, I moved on to coloring pasta, which is by far the most forgiving medium for natural food coloring. One can easily adjust moisture levels in pasta dough, which absorbs colors from solids, pastes, liquids and powders. Eggs, which are dyed in a quick bath of a colorful liquid, posed a new set of challenges.

Since we dunk eggs into liquid dyes, the pigments from colorful foods need to be transferred as much as possible to the water they are cooked in before straining off solids like shredded beets or dried flowers. And ground spice powders, like turmeric and paprika would ideally dissolve into the liquid. Not the case. Many formulas for natural dyes will tell you to use powdered turmeric for yellow. I love spices and figured I’d try others too like paprika, sumac, & chili powder. Why not?

Left: Speckled orange egg created with ground turmeric, ground paprika and oil based dye. Right: Blue polka dot egg created with butterfly pea flower dye and stickers.

Left: Speckled orange egg created with ground turmeric, ground paprika and oil based dye. Right: Blue polka dot egg created with butterfly pea flower dye and stickers.

It’s challenging to get clear vibrant color from these ground spices. First, ground spices are fat soluble, which means they work better with oil to break down and disperse their colors. But dunking an egg in oil sounded unorthodox and messy. So I followed the advice and simply simmered ground spices in boiling water for 20 minutes & then strained. The color was there, but it required a multi-hour, if not an overnight soak to dye eggs, and it left a little grit on the eggs, no matter how fine the strainer. So I revisited spices 101 and decided to bloom them first (or sauté them in a little bit of oil) before adding some water to make the liquid dye. The colors were certainly more vibrant and adhered in under 20 minutes, but the oil left a splotched rather than smooth finish on the egg - check out the orange speckled egg made from a combination of paprika and turmeric. Up next, I will attempt a dye made 100% from the ground spices bloomed in oil.

Fresh turmeric root. Grated.

Fresh turmeric root. Grated.

So, how do you get the best clear liquid yellow dye? If you have it available, fresh grated turmeric root works best. I simmered it in water just like the other fresh vegetables, and then strained off the solids. While the turmeric root itself appears orange, the liquid it creates makes a beautiful soft and natural yellow. If fresh turmeric root is not available, shredded golden beets work as well.

Top left: blue butterfly pea flower dye; Top right: yellow turmeric root dye; Bottom: Green dye made from combining

Top left: blue butterfly pea flower dye; Top right: yellow turmeric root dye; Bottom: Green dye made from combining

I had such success adding greens of all shades and varieties — sautéed, steamed, juiced and blanched spinach, kale, parsley & chard — to pasta dough & frosting that I didn’t expect it to be so challenging to dye eggs green. And, green eggs & ham, right? Wrong. For egg dying, not only do the green colors become terribly diluted in liquid, but the key ingredient required for getting dye to adhere to eggs destroys the green pigments. We add vinegar to egg dyes to create an acidic mixture that reacts with the calcium in the egg shell, allowing colors to be absorbed. While this acid creates vivid blues and bright pinks, any acid (lemon juice, wine, tomato sauce) deteriorates green rapidly and transforms it to an unappetizing olive or brown. The answer? Create vibrant greens by combining yellow and blue dye immediately before dunking eggs.

28AD9733-A57F-411C-9A48-452CB32EB79F.jpg

How to Produce a Rainbow of Natural Dyes

To make most types of natural liquid dye:

  1. Boil or steep vegetables (1 cup), spices (1 tablespoon), or dried flowers or teas (1/2 cup) in water (1 1/2 - 2 cups) for 10-20 minutes.

  2. Strain through a fine mesh strainer. Discard, compost or reuse the solids.

  3. Add vinegar and stir. Use ~1 tablespoon vinegar to 1 cup liquid dye. Use less for acidic mixtures like berries cooked in lemon juice.

Steep: to soak (food, tea, etc.) in hot water so as to extract its flavor or color or to soften or reconstitute it

Boil: to cook (food) in boiling water over a heat source


Recommended formulas

For a quick reference list of formulas for these and a full rainbow of dyes, click here.


General Tips and Hacks for Dying Eggs

Stove-top Popcorn

Back in college, my electric air popper was the highlight of my dorm floor, along with the beer die table residing at one end of the hall and the large screen TV at the other. I attracted my neighbors for study breaks (and post-beer die game drumunchies) with the aroma of freshly popping corn. I’ve graduated to not popping popcorn as a means of making new friends, and to using a regular old stove top and lidded pot to make the classic snack. Since my Stove-top Popcorn has impressed and puzzled many guests for Saturday afternoon snacks or movie night at our place, I thought I’d share how you too can make some, followed by a few ideas for yummy toppings.

Since I’ve been making popcorn this way, I have never had an un-popped kernel or burnt popcorn in a batch. I do, however, have occasional overflow of popped corn. But that is only a problem for…no one.

We get our popping corn dried on the cob from Farmer Ted at Windflower Farm, but any bagged popping corn will do.

We get our popping corn dried on the cob from Farmer Ted at Windflower Farm, but any bagged popping corn will do.

What you need:

  • average sized stainless steel pot with a well-fitting lid (I use a 3.5QT pot)

  • cooking oil (canola & olive work best, but you can try others so long as they have a high smoke point)

  • popcorn kernels

  • salt

  • seasoning and flavorings (more on that below)

What you do:

Some seasoning ideas:

Of course you can go with the classic butter and salt topping, but I encourage you to try these variations and use your own creativity.

iMx9x0d3QO2qWiS9S9GHsQ.jpg
OwIaPuuJQtOOY5rcmQ25oQ.jpg
  • Herb Butter: melt butter and mince up any herbs you have on hand, such as thyme, rosemary and parsley. Better yet, if you have some of my herb garlic butter in your freezer, just melt that and toss with your popcorn. Sprinkle with salt and serve.

  • Hot Honey Kettle Corn: Transfer the popped popcorn to a bowl and set aside. In the same pot, over low heat, melt a few tablespoons of butter. Add Mike’s hot honey (or any honey plus a couple teaspoons of dried chili flakes). Add the popcorn back to the pot and toss to coat. Transfer to a bowl. It will harden and get stickier as it cools.

  • Truffle Parmesan: Use olive oil or a combination of olive oil and truffle oil to pop the popcorn. Toss the popped popcorn in melted butter, then sprinkle with truffle salt, grated Parmesan and freshly cracked black pepper.

  • Salt and Pepper: ‘nuff said. Why does salt get all the attention when it comes to popcorn? Don’t leave out the black pepper.

  • Coconut Curry: Use coconut oil to pop the popcorn. Toss popped corn with a curry powder, madras curry or garam masala spice blend you enjoy.

  • Any spice mix plus salt and/or butter is a great addition to popped corn.

Cooking Beans from Scratch

Okay, so I’ll admit it, this post is not at all sexy, or even trendy and it might elicit some juvenile jokes about gas. But, I promise that if you learn how to cook beans properly and commit to making your own from scratch, you will actually keep that flatulence at bay…

Of course I use canned beans. They’re a fantastic convenience and as far as health is concerned, they are just as good for you as homemade, with the one distinction being sodium content. But scratch made beans — meaning cooked beans that started as dried — taste better and have superior texture. Cup for cup, they also cost less, and as an added bonus for us city-dwelling schleppers, dried beans are not as heavy to lug home from the grocery store. You can subtract the weight of the can and the cooking liquid. I know, but these are factors Brooklynites consider when it comes to making foods like beans and stock.

And since making beans from scratch is so simple and only requires a little advanced planning, water and a pot, why not? Go ahead, give your can opener a rest.

Steps to Cooking Beans from Scratch

Tips to cooking beans:

  • Soaking beans is essential. You will reduce cooking time, help them cook more evenly, and make them more digestible, eliminating the gassy effects many people experience with beans. Soak most beans for a minimum of 6 hours or overnight. If you’ll be soaking them longer than that (whoops, no time to cook them!), then give them fresh water, transfer to the fridge if they were out, and use within 2 days max. The idea is to get them to double in size after soaking. See image below.

fullsizeoutput_4471.jpeg

red kidney beans in 3 stages

1. The beans on the left are dried.

2. The beans in the middle were soaked overnight.

3. The beans on the right were pressure cooked for 5 minutes.

  • Adding salt at the beginning of the cooking process will make them more flavorful and more tender and will reduce the amount of salt you use in the dish later. Use 1/4 teaspoon to 1 cup DRIED beans (before soaking). There is much debate about salting beans during cooking. If you’re interested, read up here and here. So long as beans soaked before hand (and do not salt the soaking liquid), they will be soft enough to absorb salt from the cooking liquid and cook evenly from the beginning of the cooking process.

  • Use spices in bean dishes to help counteract flatulence. I told you that if you cook beans correctly, starting with soaking and finishing with seasoning, you can control how they are digested. Some spices that relieve flatulence include: cardamom, cinnamon, ginger, cumin, black pepper, cloves, allspice, and fennel.

  • Bay leaf helps to tenderize the beans and also aids digestion.

  • Water should just cover the beans in a pressure cooker or go twice as high as beans in a conventional pot. In the latter, add more liquid as needed while beans are cooking.

  • Pressure cookers (or those instant pots everyone has now) are great for cooking beans in a fraction of the time. See chart below. To use: seal lid, turn burner on high and bring to pressure (when pin pops up and hisses), reduce heat to low and set timer for lower end of estimated cooking time. At time, remove pressure cooker from heat and allow pressure to release on its own (pin pops down). Check beans, taste and repeat in 1-2 minute increments as needed. In a conventional pot, bring water to a boil with beans, bay leaf and salt. Reduce heat to medium and gently cook until beans are tender.

  • Cooking times will vary. Below is a very loose guideline for how long it takes to cook some common dried beans in both a pressure cooker (first number) and a typical pot with loosely fitting lid (second number), but there are so many factors that will affect how long it will take your beans to cook. And so, really, they are done when, well…they are done. You must taste to find out. Some of those factors include:

    • if/how long beans were soaked and at what temperature

    • age of the beans, which determines how “dry” they really are, and how “strong” their skins

    • variations on stove top heat

    • your personal preference and intended use of the bean: Do you like it softer or with a little firmness or chew? Do you want the beans to be creamy for a puree or stew or firm for use in a salad or pasta dish?

    Estimated cooking times (bean: pressure cooker time or conventional pot cooking time)

    • chickpeas and adzuki beans: 4-5 minutes or 3 hours

    • black beans and red kidney beans: 6-8 minutes or 90 minutes

    • black eyed peas and pidgeon peas: not recommended or 1 hour

    • navy beans and cannellini beans: 5-7 minutes or 90 minutes

    • green or french lentils, green split peas, & yellow split peas: 5 minutes or 45 minutes

    • red lentils: not recommended or 20 minutes

Bengali Red Lentil Dal

Do you need an "I've been out of town all weekend and have nothing in my fridge but want to put a healthy meal on the table pronto and have lunch for the week" kind of dish? For me, that dish is my 100% plant-based and pantry-sourced dhal and rice. It also get cheers from every single eater in my family. We make different variations of dhal, changing up the lentils, spices, aromatics and even the oil, but this Bengali Red Lentil Dhal cooks up quickest and uses the fewest ingredients. If you have them handy, you can brighten it up with chopped fresh tomatoes, cilantro leaves and slices of serrano or jalapeno peppers, luckily all things available from the garden this time of year. But those additions are not even necessary.

I have my Bengali-American friend, Ritu, to thank for this recipe. She taught it to me years ago before [tear] moving West. This dish comes closest to replicating the staple meal I ate daily while studying abroad in Nepal, half a lifetime ago. My quest for mastering dhal-bhat ended when Ritu showed me the ropes and her mom's recipe. While I'm at it, I guess I should also thank Ritu for providing fierce competition in office cooking challenges, forcing me to step up my game, and ultimately propelling me to culinary school.

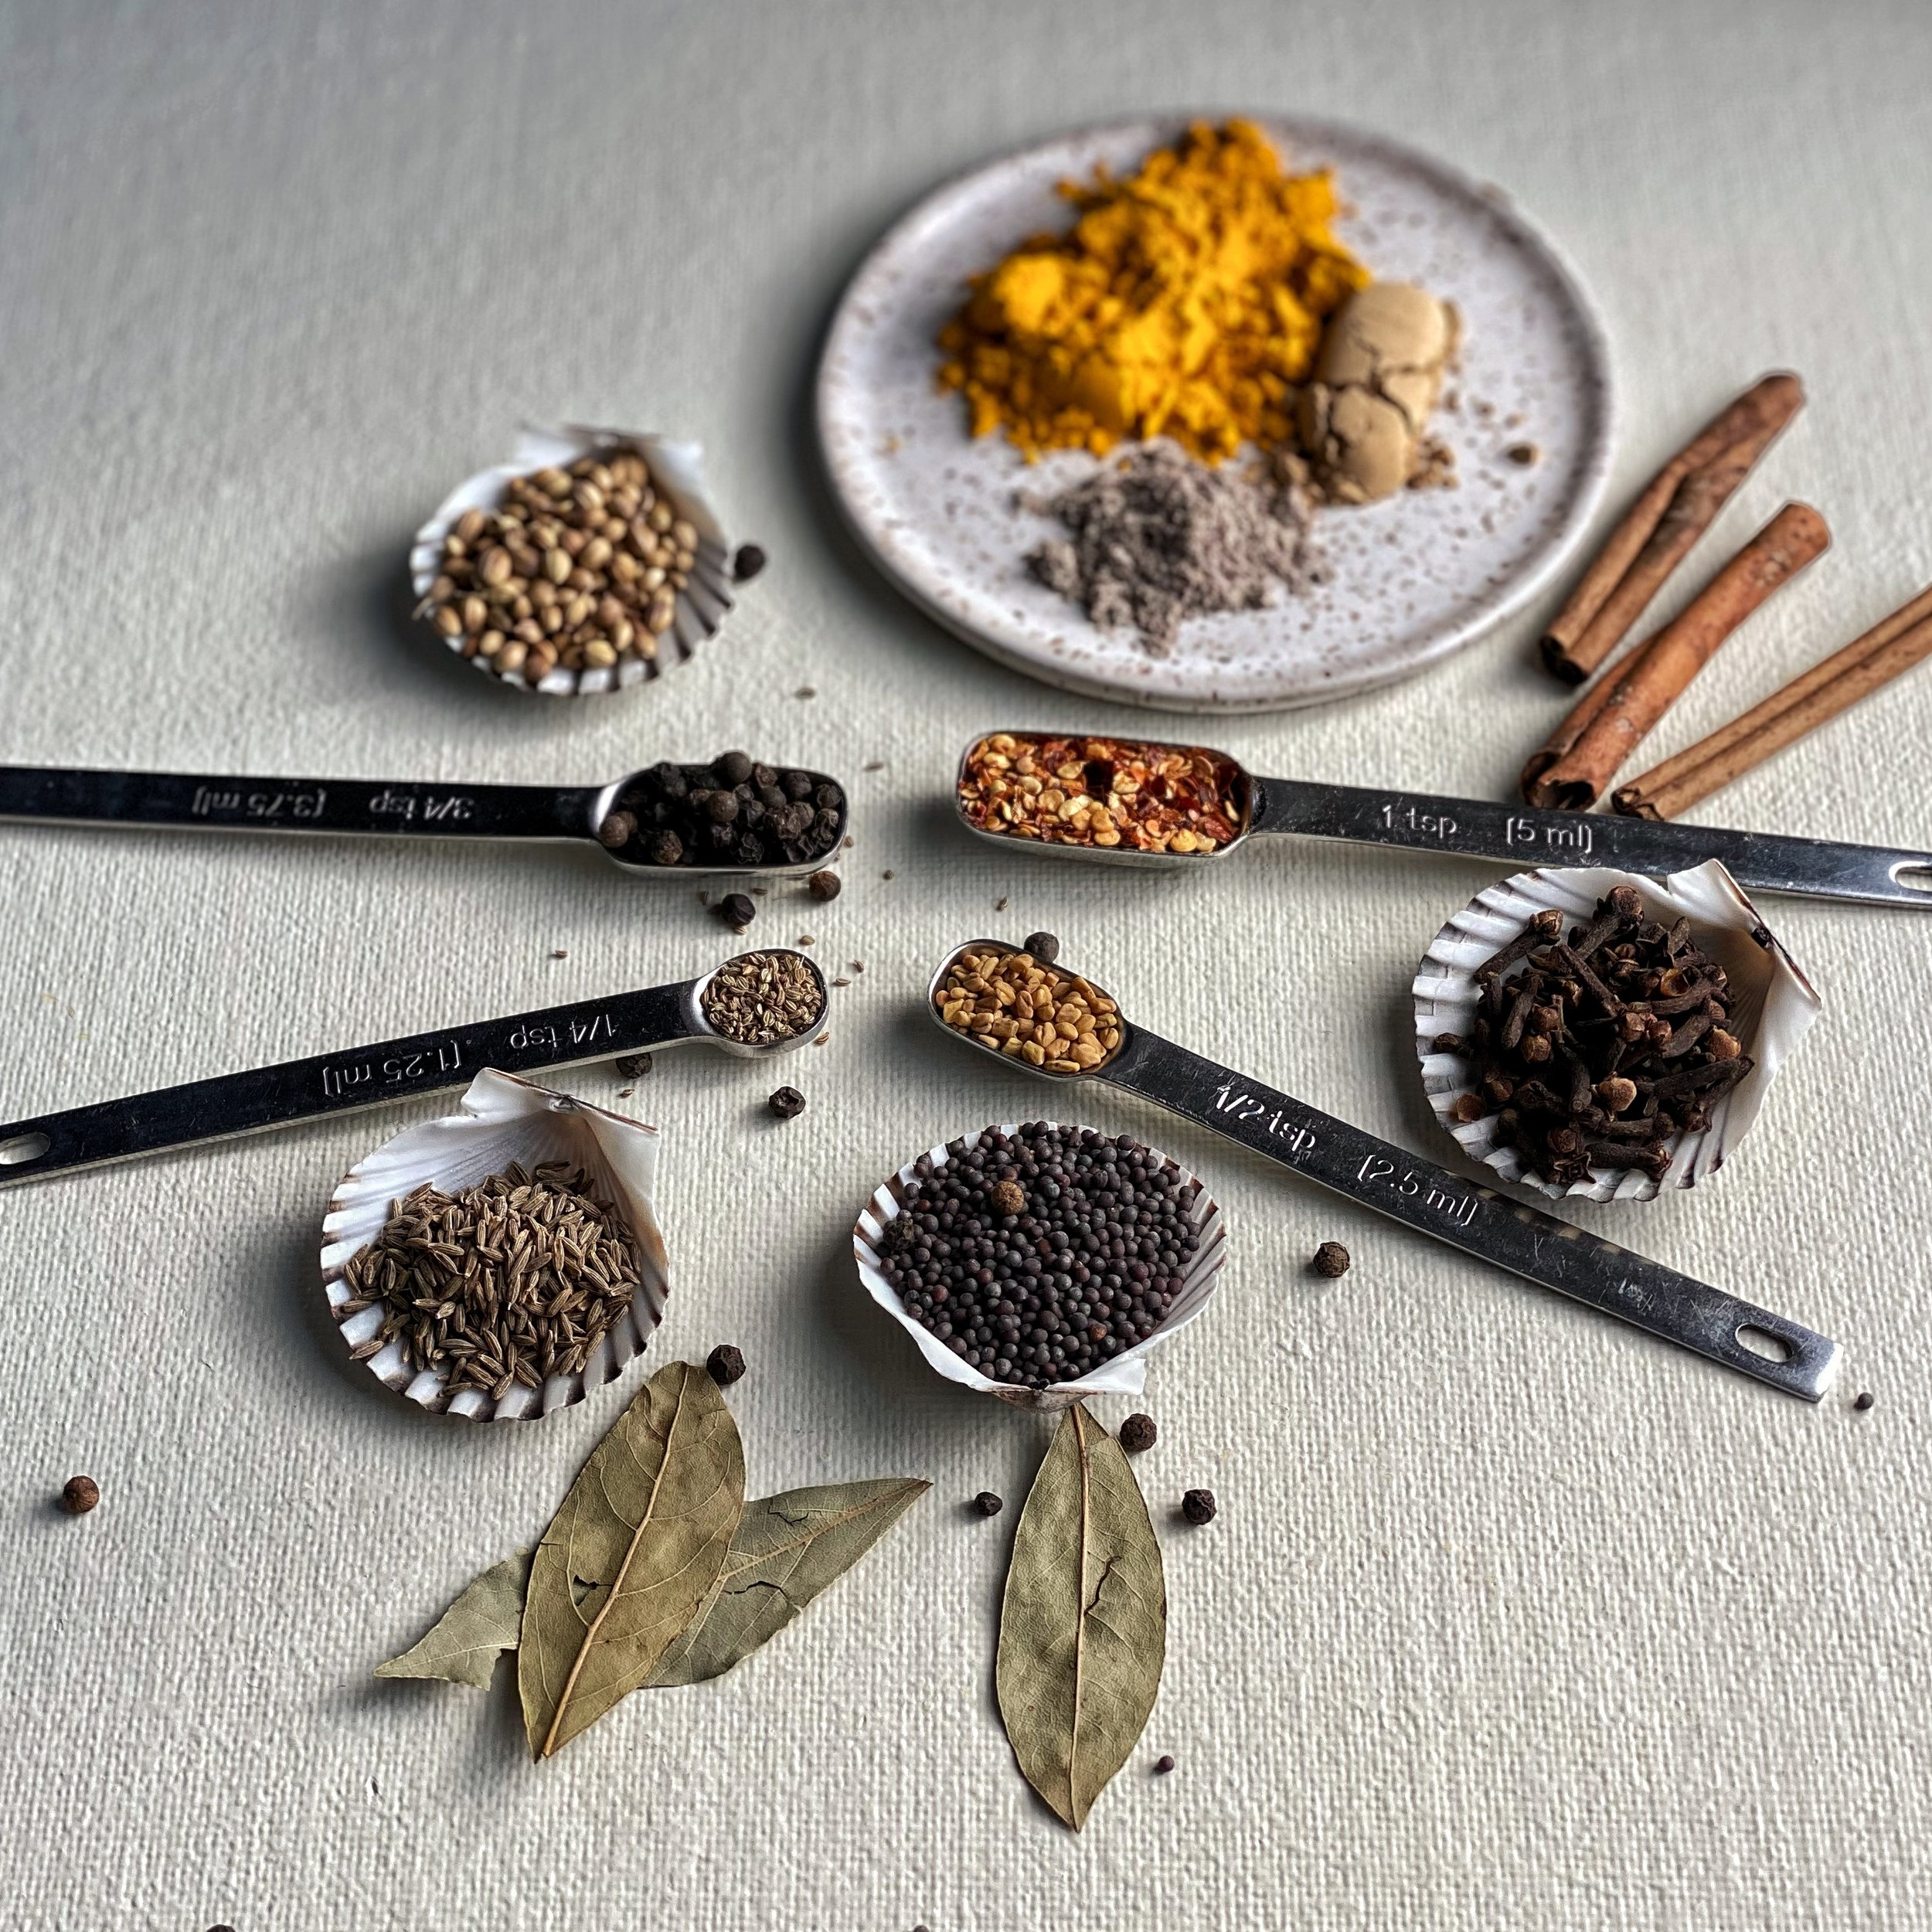
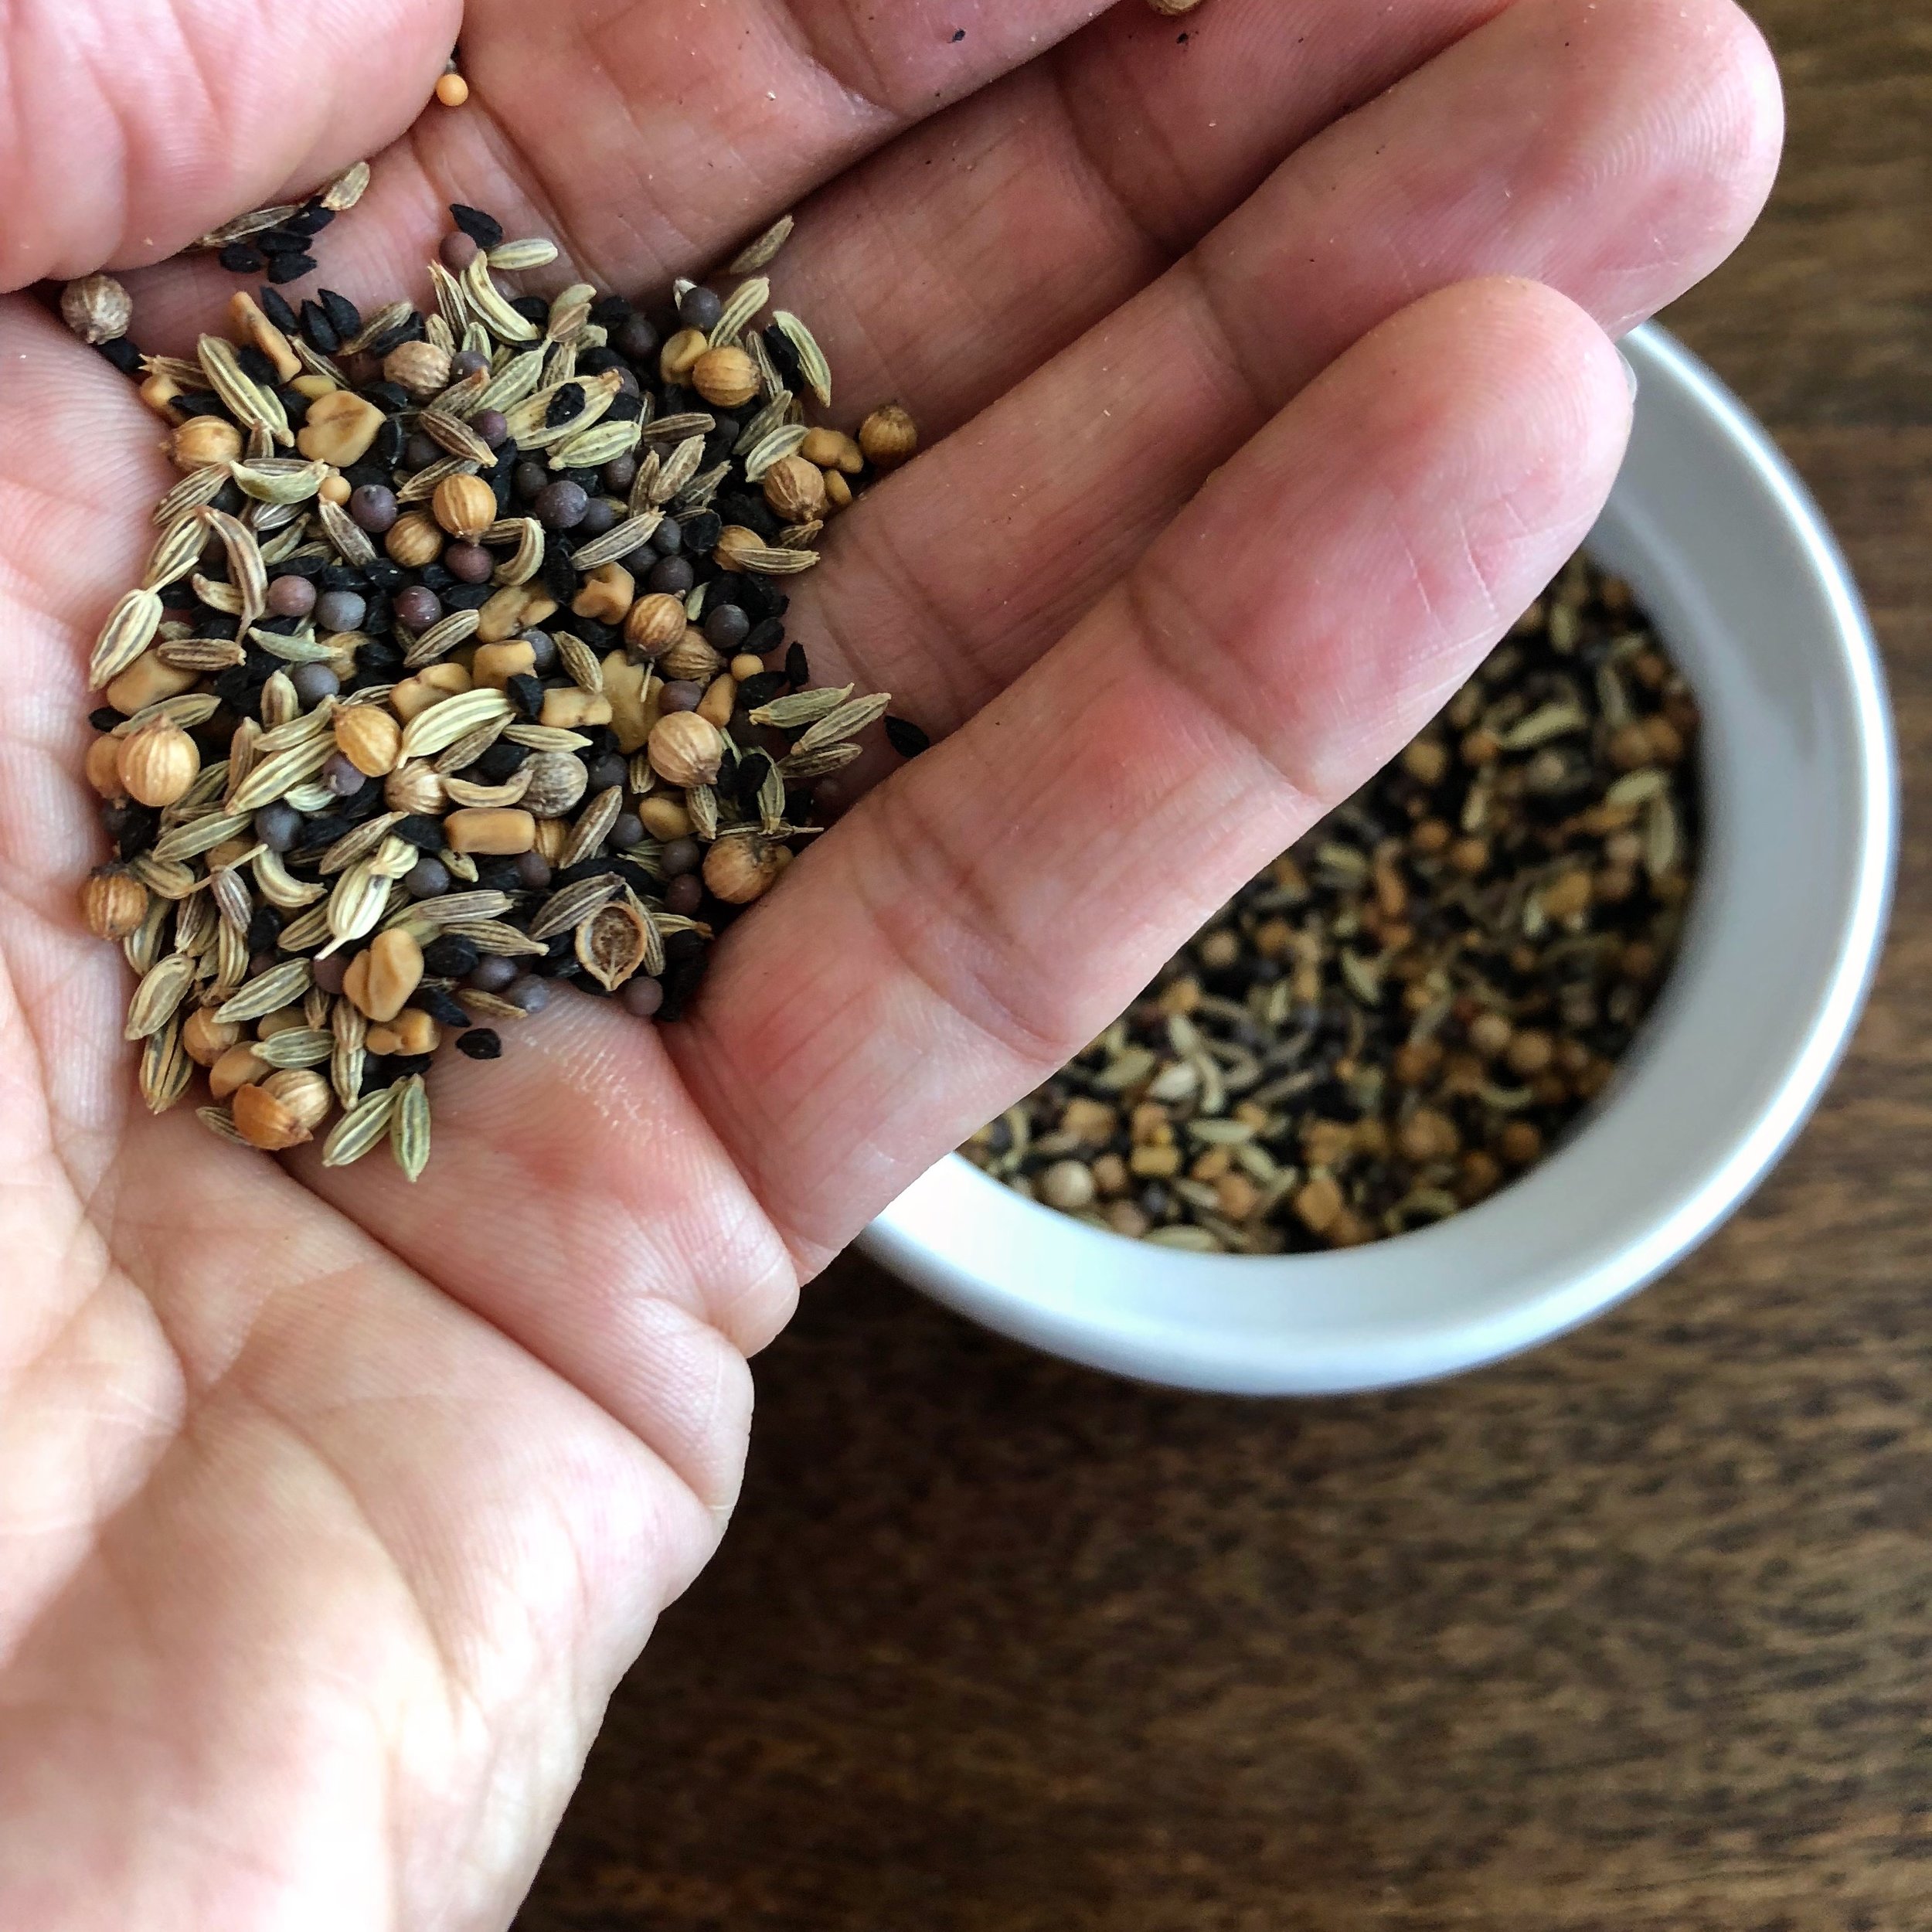
What is dhal exactly? The word dhal comes from Sanskrit meaning "to split" and refers to a wide array of lentils, peas and beans (or pulses) that can be used to make dhal. But what distinguishes dhal from any other lentil soup or stewed pot of legumes is the tarka or tadka. This hot aromatic oil seasoned with onions, garlic, ginger, chilies, and toasted and ground spices is added to the cooked lentils toward the end of the cooking and adds dramatic flavor, color, digestive fire, and healing properties to the dish.

BENGALI RED LENTIL DAL

Yield: ~5 cups

What you need:

Panch Proon translates to "five spice" and includes equal parts fennel seeds, cumin seeds, whole fenugreek, black mustard sees and nigella (onion or black carraway) seeds. My panch proon blend is featured here with coriander seeds also used in this …

Panch Proon translates to "five spice" and includes equal parts fennel seeds, cumin seeds, whole fenugreek, black mustard sees and nigella (onion or black carraway) seeds. My panch proon blend is featured here with coriander seeds also used in this dhal.

The dhal:

  • 2 cups red lentils

  • 4 - 5 cups water

  • ½ teaspoon kosher or sea salt

The tadka:

  • 2 tablespoons panch proon (see left)

  • 1 teaspoon coriander seeds

  • 2 tablespoons ghee or coconut oil

  • 1 onion, small dice

  • 3 cloves garlic, minced

  • 3 tablespoons ginger, julienned

  • 1 dried kashmiri chili, chopped, optional

  • 1 tomato, chopped, optional

  • Sea salt to taste

The garnish:

  • Cilantro leaves

  • 1 jalapeno or serrano chili, minced

  • 1 tablespoon ginger, thinly sliced

IMG_3053.JPG

What you do:

Soak the lentils in a large pot of cool water for a minimum of 20 minutes (optional). Rinse thoroughly until water runs clear (not optional). Return the lentils to the pot and cover with 4-5 cups water.

Bring the water to a rolling bowl, add the salt, reduce heat and simmer until lentils are tender.

iAdX08zbRrqfBY9E5yG8QQ.jpg

In a separate sauté pan, toast the spices until fragrant and lightly browned, about 30 seconds. Remove from heat. Allow to cool and then grind coarsely in a spice grinder or mortar and pestle.

0iSWcN1TQ8K5vWTaTafjMA.jpg

Make the tadka. In the same sauté pan, heat ghee or coconut oil over medium high heat. Add the onions and a pinch of salt. When onions are soft, add the garlic, ginger, chili and ground spices. Sauté about 1 minute longer.

Pour tadka into dal. Add the diced tomato, if using. Simmer an additional 10 minutes or up to 2 hours. Thin dal with additional water if needed.

Garnish with cilantro leaves and jalapeno. Serve with spiced brown basmati rice.

fullsizeoutput_1966.jpeg

Fish En Papillote

Fish en papillote or "fish steamed in a packet" is the perfect healthy weeknight-dinner-in-a-flash or prepare-ahead-presentation to amaze your fancy friends dish. I also love it because, like most of my techniques and formulas, it is versatile and can be completed with various types of fish and whatever vegetables, citrus and seasonings I have on hand or feel like using. It works in all seasons - just vary the contents. Spices and fats are optional. So versatile, in fact, everyone in the family can make a personalized version suited to his or her exact tastes and preferences. Last but definitely not least, it conveniently uses up that opened bottle of white wine hanging out in the fridge that no one is ever going to drink.

The amounts listed are for 1 serving or 1 papillote pouch. You can easily multiply to provide as many servings as you need, plus an extra for tomorrow's lunch. This provides a meal unto itself, but also pairs well with additional roasted, steamed or sautéed vegetables, roasted potatoes or steamed rice.

What you need:

  • 3-5 oz fish fillet (cod, arctic char, salmon, monkfish, trout are all good choices)*

  • 1/2 teaspoon extra virgin olive oil or melted butter, optional

  • 2-3 pinches sea salt or kosher salt

  • ground spices, such as black pepper, cumin, cayenne, garlic powder, crushed red pepper flakes, optional

  • 1-2 tablespoons liquid. I prefer a dry white wine, but beer, broth and even water do the trick.

  • 1/4 cup finely sliced or diced vegetables. Use what you have on hand. Carrot, zucchini, bell pepper, cabbage, jalapeño, brussel sprout, and sweet potato are all great.

  • 1 slice of lemon, orange or lime

  • parchment paper cut into large "hearts"

How to prepare the parchment for papillote:

*Note on fish selection: Where you live will determine the best fish choices for you, for freshness and sustainability. Check out this resource by Oceana and Monterey Bay Aquarium's Seafood Watch for a guide on selecting fish. You can choose printable pocket guides that are specific to your region or download their nifty phone app.

What you do:

Note that fish cooked en papillote will cook faster than if you are roasting fish outside of parchment. The steam trapped inside the papillotte is hotter than your oven and will cook fish faster.

Perfect Soft Boiled Eggs

There's no mistake. Poached eggs are heavenly. Who doesn't love lazily rolling out of bed on a Sunday and strolling to brunch for a hash or hollandaise-smothered dish with a perfectly runny, bright yellow poached egg on top? But soft boiled eggs are so much more... practical. And I appreciate the practical. While poached eggs are cooked one at time in a carefully watched barely simmering pot of water, soft boiled eggs can be made by the dozen, left bubbling away on the stove, monitored by a timer, cooled, and stored for a week's worth of breakfasts on the go. If you're hosting brunch, this is a smarter option for advanced preparation. And those soft boiled eggs are easily transported as compared to their delicate poached cousins.

What you do:

For soft boiled perfection every time, follow these 6 simple steps. All you need to remember is 6 minutes. Do this just once a week for daily enjoyment.

Tip: To prevent cracking and ensure consistently cooked eggs, use room temperature eggs.

IMG_4881.JPG

Peel and enjoy soft boiled eggs immediately on your favorite benedict, with a toasted bagel or over a hash like my Spicy Root Vegetable and Sausage Hash (pictured below). Store any remaining soft boiled eggs in their shells in the fridge (this makes them sturdier and prevents breaking when transporting in your lunch box). Make at least a half dozen at once so you have soft boiled eggs to add to kale salad, caesar dressing, roasted veggies, and avocado toast throughout the week.

All Hail the Stale

Make your own Breadcrumbs

When life gives you stale bread, you take that brick and turn it into breadcrumbs. Did you know that a canister of store-bought breadcrumbs contains approximately 40 different ingredients, many unpronounceable? And those sawdust particles are rarely ever made from whole grains. Compare that to just 5 or 6 ingredients found in breadcrumbs made from a loaf of your favorite local bakery or home-baked bread. Why? It's all about the shelf life - how long can that canister sit in a warehouse, 18-wheeler, grocery store, and your pantry? With those ingredients, likely through the next nuclear winter. You don't need that, though. Do you?

So make your own. They won't survive nuclear winter, but they will last at least a month or more in an airtight glass jar. It's so simple and you will feel so satisfied knowing you spared a dried out loaf from the garbage chute and now have a wholesome ingredient on hand. And your friends might refer to you as Martha Stewart. Wait, don't let that be the reason you don't try this at home. Please try this at home.


How to use them:

There are so many uses for homemade breadcrumbs. Here's just a few. Please share yours and I'll add to this list.

  • veggie burgers (black bean, lentil walnut, kasha potato, the list goes on and on)

  • stuffed mushrooms

  • breading or coating for croquettes

  • meatballs of all varieties (note that if you are mimicking the "Italian style" breadcrumbs used in classic meatballs, you will want to add a little dried parsley, oregano, basil and a pinch or two of salt)

  • crunchy topping for a casserole like my pasta, cauliflower and cheese bake (recipe coming soon) or my vegan green been casserole

  • to add texture to a salad or grain bowl

  • as an alternative to croutons in caesar salad or this roasted romanesco with lemony anchovy dressing


2 notes for the gluten free crowd:

1. The above procedure might be a lifesaver for you. Now you can make your own gluten free bread crumbs with your favorite gluten free bread or crackers and save yourself the trouble and expense of finding rare packaged gluten free breadcrumbs.

2. There are gluten free substitutes for the uses of breadcrumbs I listed here. Stay tuned for some recipes and techniques coming soon. First up: my gluten free alteration of a family classic stuffed mushroom recipe.

What you do:

Possibilities for Fresh Pumpkin Puree

Possibilities for Fresh Pumpkin Puree

American supermarkets have it all wrong. Those aluminum pyramids of mashed orange pulp should be displayed in March, not November. Why, at the height of harvest, would I eat last year’s (at best) pumpkin packed into a can when I can eat this week’s pumpkin fresh from the oven? Furthermore, what else are we going to do with the pumpkins we bought at Halloween and had every intention of turning into jack-o-lanterns?